


News & Exhibitions
Latest Factory Updates, Industry Trends & Global Exhibition Information
ABS Edge Banding Machine Setup: Controlling Feed Speed, Heat, and Edge Finish
Clean ABS edging is not achieved by turning every setting higher. A fast feed rate with insufficient adhesive activation produces weak bonding; excessive heat can darken glue, increase squeeze-out, and leave a visible line. Aggressive trimming may hide a bonding problem temporarily while creating chipped corners or a wavy edge. Reliable results come from matching feed speed, glue temperature, pressure, and finishing-tool settings to the actual panel, tape, adhesive, and shop conditions.
On an ABS edge banding machine, the edge finish should be judged as a sequence: tape delivery, glue transfer, pressure rolling, end trimming, top-and-bottom trimming, scraping, and buffing. A defect seen at the final inspection point may have started much earlier. Operators who isolate the stage causing the defect will make faster corrections and waste fewer panels than those who adjust every unit at once.
Start with the panel and edging, not the control panel
Before changing machine settings, inspect the incoming materials. ABS tape should be stored flat, protected from dust, and allowed to reach the working area’s temperature before use. Very cold tape can resist forming around the panel edge and may appear less flexible at the end-trimming stage. Tape that has been stored under tension, exposed to heat, or damaged at the roll edge can create feeding and alignment problems that no pressure-roller adjustment will fully solve.
The panel edge matters just as much. MDF, particleboard, plywood, and laminated boards do not accept adhesive in the same way. A freshly machined MDF edge is generally more uniform than a porous or damaged edge, while a chipped melamine surface can create gaps that show up as glue lines. Dust is especially damaging: it forms a barrier between adhesive and substrate, reduces heat transfer, and can cause local lifting after the panel leaves the machine.
A pre-milling unit is valuable when panel edges are inconsistent, but it only helps when cutters are sharp and correctly positioned. A dull tool can compress particleboard or tear the laminate rather than create a clean bonding surface. The operator should check that pre-milling removes only the minimum material needed to produce a square, clean edge. Excessive removal changes the panel dimension and can expose core material beyond the intended edge profile.
- Confirm that panel edges are dry, free of sanding dust, and not crushed.
- Check the ABS roll for curling, telescoping, edge damage, or inconsistent width.
- Match tape thickness and width to the trimming program and cutter capacity.
- Verify that the adhesive grade is appropriate for ABS, the board type, and the expected service conditions.
These checks are particularly important when a production run changes from one board supplier, décor surface, or tape thickness to another. A setting that worked on a dense, smooth board should not automatically be copied to a more porous substrate.
Feed speed controls the bonding window
Feed speed is not simply a productivity setting. It determines how long the panel edge remains in contact with the adhesive and pressure rollers, and how much time is available before the adhesive cools. When speed increases, the glue system, tape feed, pressure zone, and trimming units must all keep pace. If they do not, defects often appear as incomplete adhesion, exposed glue line, or tape movement at the leading and trailing ends.
A practical setup method is to establish stable quality at a moderate feed speed before raising output. Run several test panels rather than relying on one sample. Inspect the leading end, center section, and trailing end separately. A bond that looks acceptable in the middle but opens at one end points toward timing, pressure, panel tracking, or tape-cutting synchronization rather than a simple adhesive-temperature issue.
When feed speed is reduced, operators should not assume the result will automatically improve. Slower travel can increase the time hot glue is exposed before compression and may lead to greater squeeze-out if pressure is unchanged. It can also alter the relationship between panel travel and the programmed positions of trimming, scraping, or corner-rounding units. Any major speed adjustment should therefore be followed by a check of glue spread, roller action, and finish quality.
Signs that feed speed is too high for the current setup include:
- Edge lifting that is more noticeable near the ends of the panel.
- Uneven glue coverage or dry sections along the board edge.
- ABS tape wandering before it reaches the pressure rollers.
- Rough end cuts caused by tape vibration or insufficient clamping stability.
- Trimming marks that become more pronounced as output speed rises.
There is no universal “correct” speed for every ABS edge banding machine. The usable setting depends on glue type, glue-pot condition, ambient temperature, panel dimensions, edge material, machine configuration, and the condition of each processing unit. The best production speed is the highest speed at which the machine still produces repeatable bonding and a stable finish across the full batch—not the highest number displayed on the controller.
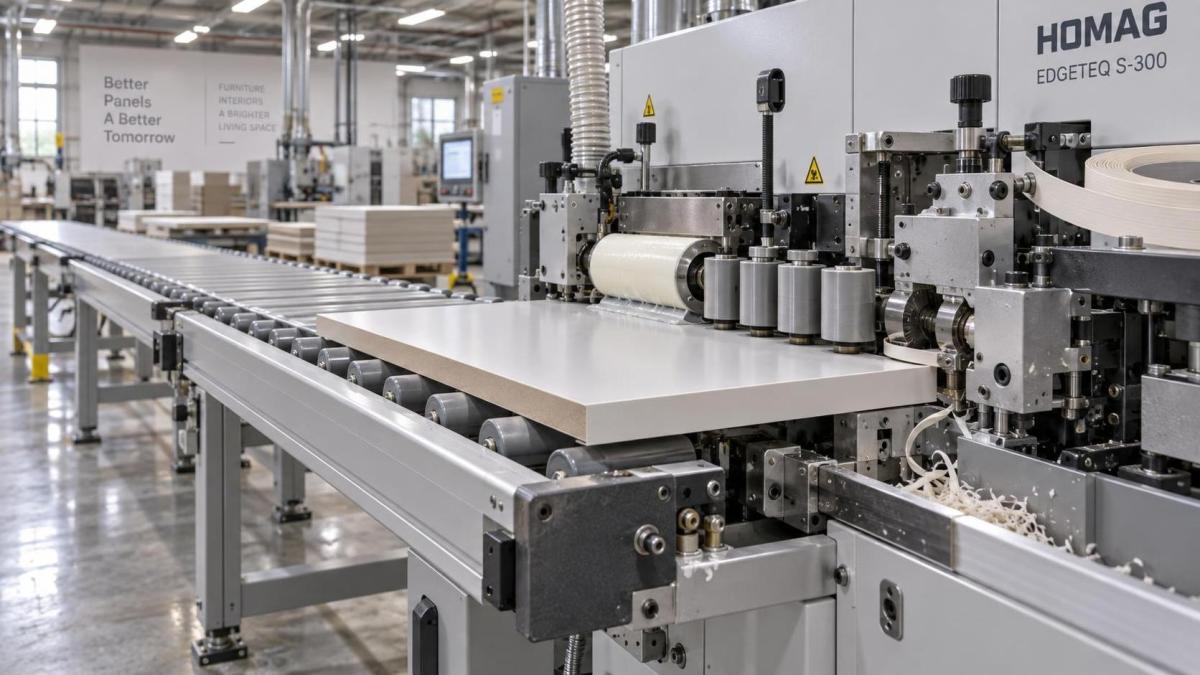
Adhesive heat must be measured as a process, not assumed from a display
Glue temperature is often blamed first when ABS edging fails, but the value shown on the machine is only one part of the thermal condition. The adhesive must be heated to the range specified by its supplier, remain at that range long enough to flow correctly, and reach the panel edge before cooling excessively. Temperature at the glue pot, temperature at the application roller, board temperature, and room temperature all affect the actual bond.
For EVA hot-melt adhesives, operating ranges are commonly set according to the adhesive manufacturer’s technical data sheet, often in a relatively high-temperature band. The correct figure varies by formulation and should not be replaced with a generic machine setting. PUR hot melts require a different handling approach, including moisture control and disciplined cleaning, because cured PUR residue cannot be treated like ordinary remeltable EVA glue.
Overheating does not create a stronger bond. Adhesive kept too hot for too long may degrade, discolor, form charred particles, or change viscosity. Those particles can appear as dark specks in the glue line or cause an irregular application pattern. If the glue pot has been held at operating temperature during long idle periods, inspect the adhesive condition before resuming production. Follow the adhesive supplier’s guidance for standby temperature and permissible open time.
Insufficient heat creates the opposite problem: the glue may not wet the board edge or ABS backing adequately before pressure is applied. The tape may seem attached when it leaves the machine but can be peeled back after cooling. A weak bond that occurs only during cold mornings or after panels have been stored in an unheated area often points to cold material rather than an incorrect glue-pot setting.
Useful checks include observing whether the adhesive film is continuous on the board edge, whether its spread is even from top to bottom, and whether the glue is being transferred rather than accumulating on the application roller. Avoid testing bond strength on a panel that is still hot. Allow the adhesive to set, then inspect for continuous attachment along the edge. Where internal quality procedures permit, a controlled peel check on an offcut can reveal whether failure occurs at the glue-to-board interface, glue-to-ABS interface, or within the board surface itself.
Pressure rollers should seat the tape, not squeeze out the entire glue film
Pressure rollers complete the bond by pressing the ABS tape into the adhesive layer while it is still workable. Too little pressure leaves air gaps and weak contact. Too much pressure can force excessive adhesive out of the joint, reveal a glue line, and create a starved bond in local areas. On narrow components, excessive roller force can also affect panel tracking.
The rollers should contact the tape in a controlled sequence, with the first roller establishing adhesion and later rollers consolidating the contact. Check that their surfaces are clean, rotate freely, and are not hardened, cracked, or coated with cured glue. A contaminated roller can mark the tape face or create inconsistent pressure bands.
Roller positioning must reflect tape thickness. Moving from thin ABS to a thicker edge without recalibrating the pressure system can cause a visible step, glue squeeze-out, or poor tape seating. Observe the edge directly after the pressure zone. The tape should sit flush against the board without oscillation, while glue squeeze-out should be limited and consistent rather than heavy or intermittent.
A visible glue line is not always a glue problem
Operators often respond to a visible line by increasing adhesive temperature or application volume. This can make the line worse. The apparent line may be caused by a mismatch between tape color and board décor, an uneven panel edge, poor pre-milling, insufficient tape compression, excessive trimming removal, or a scraper set too aggressively.
First distinguish between a true adhesive gap and a color contrast at the joint. A true gap may show as an intermittent dark shadow, void, or opening when viewed under side lighting. If the line remains perfectly even along the entire edge and the tape is fully bonded, the issue may be visual matching rather than bond quality. That requires a decision on tape color, surface texture, panel décor, or finishing method—not a hotter glue pot.
Glue line visibility also changes with lighting angle. Inspect test panels under the same lighting conditions used for final quality control. A high-gloss surface can reveal small geometry differences that would be invisible on a textured or matte board.
Trimming setup determines whether a good bond remains a good-looking edge
End-trimming and contour-trimming units should remove excess tape cleanly without pulling on the bond line. If cutters are dull, contaminated, or running at an unsuitable speed, they can chip ABS, melt the edge locally, or leave feathered material. A cleanly bonded tape can then look defective even though the pressure and adhesive stages were correct.
Set cutter position so that the machine removes the intended overhang without cutting into the panel surface. This is especially important on thin-faced melamine or veneer panels, where a minor alignment error can expose the substrate. When changing from one tape thickness to another, verify cutter geometry and the related program offsets before processing a full batch.
Scrapers should refine the edge rather than compensate for poor trimming. An over-set scraper can create a bright line, remove too much material at the corner, or leave repetitive marks. A scraper that is too light may leave a sharp edge or minor milling traces. The appropriate result depends on the tape profile and finish: a square edge, a small radius, and a softformed profile do not use the same trimming and scraping relationship.
Buffing wheels are the final cosmetic stage, not a repair station. They can remove light residue and improve surface appearance, but heavy buffing can generate heat and smear adhesive residue across the panel face. If residue is excessive, trace it back to glue application, pressure, or trimming before increasing buffing intensity.
Change one variable at a time when defects appear
Multiple simultaneous adjustments make troubleshooting unreliable. If feed speed, glue temperature, roller pressure, and trimming position are all changed together, it becomes impossible to identify which action improved or damaged the result. Use a short controlled sequence: note the defect, inspect the corresponding machine stage, make one adjustment, and run enough samples to confirm that the change is repeatable.
Keep setup records tied to materials, not just product names
A useful setup record identifies the board construction, surface finish, panel thickness, ABS thickness and width, adhesive type, feed speed, temperature settings, pressure-roller position, cutter program, and room condition when relevant. Recording only the cabinet model or order number is not enough, because the same design may later be produced with different board or tape batches.
These records reduce restart time after maintenance, shift changes, or repeat orders. They also help separate recurring material issues from machine drift. If a previously stable setting suddenly produces weak adhesion, check changes in adhesive batch, tape backing, board storage, pre-milling quality, and ambient conditions before modifying the baseline recipe.
Edge-banding quality should be considered alongside the rest of the panel-finishing route. For example, cabinet-door production may use both edge banding on square components and membrane pressing on profiled surfaces. A Vacuum membrane laminating machine uses vacuum pressure and controlled heating to apply PVC, PET, veneer, or decorative films to shaped panels; it does not replace the mechanical trimming and adhesive-control steps required for ABS edging. Treating these as distinct finishing processes prevents incorrect comparisons of bonding appearance or heat settings.
The most stable ABS edge banding machine setup is therefore a controlled balance rather than a maximum setting. Feed speed must leave enough time for adhesive transfer and pressure consolidation. Heat must support proper flow without degrading the glue. Pressure must seat the tape without starving the joint. Trimming and scraping must preserve the profile created upstream. When those conditions are checked in sequence, clean edges become repeatable rather than dependent on repeated trial-and-error adjustments.
Send Your Inquiry
We welcome your cooperation and we will develop with you.