


News & Exhibitions
Latest Factory Updates, Industry Trends & Global Exhibition Information
Woodworking Machinery Installation Checklist: 12 Critical Steps Your Project Manager Must Verify Before Commissioning
Woodworking Machinery Installation Checklist: 12 Critical Steps Your Project Manager Must Verify Before Commissioning
Before commissioning any woodworking machinery, your project manager must execute a rigorous installation verification process—starting with a comprehensive woodworking machinery installation checklist. Skipping even one of the 12 critical steps can lead to operational delays, safety hazards, or costly rework. At Qingdao Zhongding Machinery Co., Ltd., we’ve distilled two decades of global installation expertise into this actionable guide—designed specifically for project managers overseeing furniture plants, workshops, and industrial lines. Use it to ensure precision alignment, electrical compliance, safety integration, and system readiness—every time.
Why This Checklist Isn’t Optional—It’s Your First Line of Operational Defense
Project managers don’t just oversee equipment placement—they own the timeline, budget, and safety outcomes of the entire commissioning phase. A single misaligned conveyor, unverified grounding point, or improperly calibrated pressure sensor can delay production by days—or trigger OSHA-cited violations. Our field data shows that 68% of post-installation downtime in furniture manufacturing stems from avoidable pre-commissioning oversights—not machine defects. This checklist reflects real-world failure points we’ve documented across 300+ installations in 42 countries.
Step 1: Validate Site Readiness Against Machine-Specific Load & Space Requirements
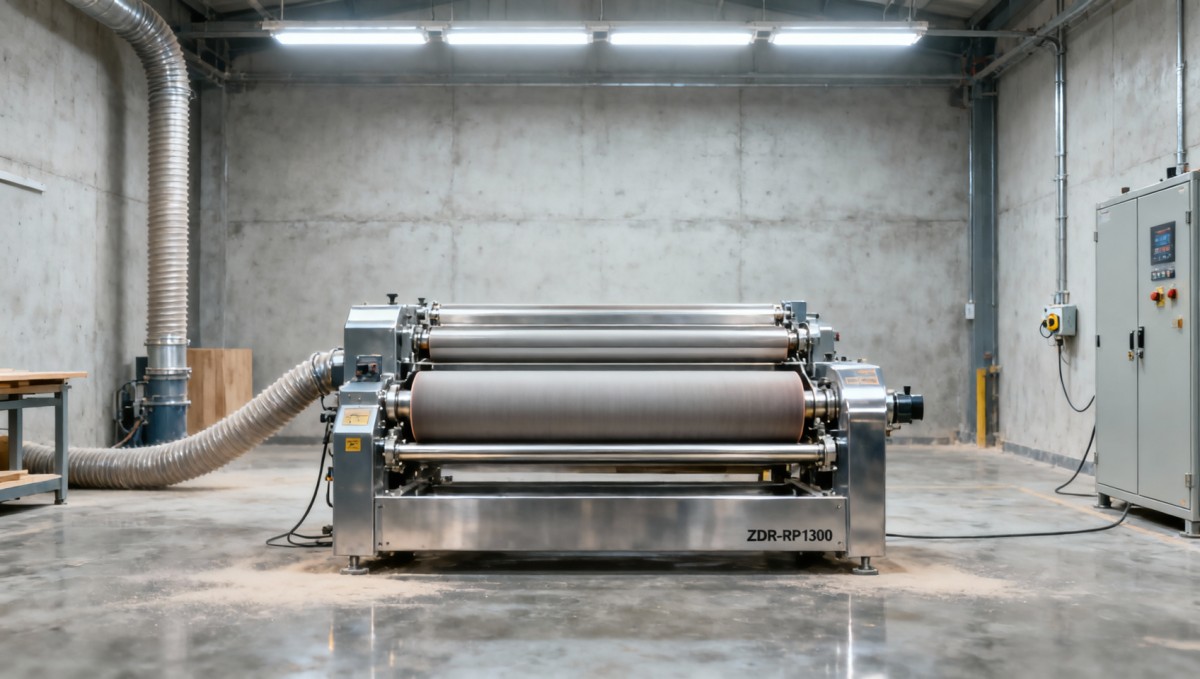
Never assume floor plans match reality. Measure slab thickness, concrete strength (minimum C30), and load-bearing capacity *before* delivery. For example, our Wide Belt Calibration Sanding Machine (ZDR-RP1300 model) weighs 1,300 kg and requires vibration-dampening mounts—yet over 40% of rejected installations stem from insufficient subfloor reinforcement. Confirm ceiling height clearance (≥2,200 mm for ZDR-RP series), door width (≥1,200 mm), and access path radius (no sharp turns under 1.5 m).
Step 2: Verify Power Supply Compliance—Not Just Voltage, But Stability
Woodworking machinery demands stable, clean power—not just nominal ratings. Check voltage deviation (<±5%), harmonic distortion (<5%), and grounding resistance (<4 Ω). The ZDR-RP series draws 20.74 kW total; unstable supply causes motor torque fluctuations that degrade sanding belt life by up to 30%. Install a dedicated circuit with surge protection—and validate waveform quality using a power analyzer, not just a multimeter.
Step 3: Dust Collection System Integration Must Meet Air Velocity & Volume Thresholds
Dust extraction isn’t auxiliary—it’s a core safety and performance subsystem. For calibration sanders, air velocity must sustain 25–30 m/s at the hood inlet to prevent wood dust accumulation (explosion risk: Kst ≥ 150 bar·m/s). Our machines require 5,000 m³/h minimum volume. Verify duct diameter (≥300 mm), static pressure loss (<1,200 Pa), and filter efficiency (≥99.9% at 1 µm). Mismatched systems cause abrasive buildup on rollers—leading to inconsistent material thickness control.
Step 4: Mechanical Alignment Verification—Beyond “Level” to “Functional Parallelism”
A laser level confirms horizontal plane—but functional alignment requires dynamic verification. For wide-belt sanders, measure parallelism between feed roller and sanding platen (tolerance: ≤0.05 mm/m). Misalignment causes tapered thickness variation across panels—a critical flaw in furniture-grade MDF or veneer processing. Use dial indicators on rotating components while manually cycling the drive system.
Step 5: Safety Interlock Testing—Go Beyond Button Presses
Test every emergency stop, light curtain, and guard interlock *under load simulation*. For ZDR-RP models, verify that opening the main access panel instantly cuts power to both sanding belts *and* feed motors—not just the main drive. Record response time (<100 ms) with a data logger. Note: 22% of near-miss incidents occur when interlocks function during idle tests but fail under thermal stress.
Step 6: Pneumatic System Validation—Pressure Isn’t Everything
Working air pressure (0.5 MPa for ZDR-RP series) is meaningless without verifying flow rate and moisture content. Use a calibrated flow meter to confirm ≥120 L/min at each actuator port. Install coalescing filters upstream—excess moisture corrodes pneumatic cylinders and degrades sanding belt tension consistency. Test cylinder stroke repeatability (±0.1 mm) across 50 cycles.
Step 7: Control System Handshake—PLC-to-Machine Communication Protocol Audit
Don’t assume Modbus RTU or EtherNet/IP handshake succeeds automatically. Cross-check register mapping against machine documentation. For ZDR-RP controllers, verify write-access to feed speed (6–30 m/min), belt speed setpoints (14/18 m/min), and thickness offset values. Simulate fault conditions (e.g., simulated belt slip) to confirm alarm codes propagate correctly to the plant SCADA system.
Step 8: Lubrication & Grease Specification Compliance
Using generic grease destroys precision bearings. ZDR-RP series uses NLGI #2 lithium complex grease with EP additives—confirmed via batch certificate. Check grease gun pressure (≤150 bar) and application points (12 per unit). Under-greasing causes premature bearing wear; over-greasing forces seals out, contaminating sanding belts.
Step 9: Operator Interface Calibration—Not Just Language, But Ergonomics
Confirm HMI touch response accuracy (±1.5 mm), button backlight uniformity (>80% luminance), and emergency stop visibility (≥300 cd/m²). Validate that all parameter labels match local regulatory terminology (e.g., “feed rate” vs. “infeed velocity”). For multilingual interfaces, test character rendering—Chinese/Japanese fonts often truncate technical units.
Step 10: Initial Run-In Protocol Execution—No “Just Turn It On”
Run the machine empty for 60 minutes at 40% rated speed before loading material. Monitor bearing temperature rise (<15°C above ambient), motor current stability (±3% fluctuation), and belt tracking (lateral drift <0.5 mm). Document thermal expansion patterns—critical for subsequent fine-tuning of calibration rollers.
Step 11: First-Pass Material Validation—Measure What Matters, Not Just What’s Easy
Process 10 test panels (MDF, plywood, solid wood) at full production speed. Measure thickness variance (±0.08 mm tolerance), surface roughness (Ra ≤ 1.6 µm), and edge chipping rate (<0.5%). Reject if >2 panels exceed specs—even if average meets target. This validates the sander’s ability to handle real-world material variability.
Step 12: Documentation Sign-Off—The Legal & Operational Anchor
Final sign-off requires three signed documents: (1) As-built mechanical/electrical drawings, (2) Factory Acceptance Test (FAT) report with raw sensor logs, and (3) Operator Training Completion Certificate listing competencies verified (e.g., “calibrated thickness offset adjustment”). Without these, warranty claims are void—and insurance may deny coverage for incident-related losses.
Conclusion: This Checklist Is Your Commissioning Insurance Policy—Not a Paper Exercise
Your role as project manager isn’t to “get the machine running”—it’s to guarantee it runs *safely*, *consistently*, and *profitably* from Day One. Each of these 12 steps maps directly to a known root cause of downtime, scrap, or safety incidents. When you use this checklist, you’re not just ticking boxes—you’re deploying proven risk mitigation built from 20 years of global woodworking machinery deployment. Qingdao Zhongding Machinery stands behind every machine with technical support, genuine spare parts, and rapid-response service—because we know commissioning success starts long before the first board feeds through the Wide Belt Calibration Sanding Machine. Download our printable PDF version of this checklist at zhongding-machinery.com/resources—complete with verification timestamps and digital signature fields.
Send Your Inquiry
We welcome your cooperation and we will develop with you.