


News & Exhibitions
Latest Factory Updates, Industry Trends & Global Exhibition Information
How to reduce cross-grain scratches on a solid wood sanding machine
How to reduce cross-grain scratches on a solid wood sanding machine
Cross-grain scratches can turn a smoothly sanded solid wood panel into costly rework, especially when stain makes hidden marks stand out. If you operate a Solid Wood Sanding Machine, reducing these defects starts with checking abrasive condition, grit progression, feed speed, and sanding pressure—not simply switching to a finer belt. Dust buildup and uneven stock removal can also leave marks that compromise the finish.
The useful question is not just “Which grit should I use?” It is “Where is this scratch being introduced, and why is the next operation failing to remove it?” Answering that question keeps adjustments controlled and avoids sanding good material away without fixing the cause.
Read the scratch before changing the settings
Start with a rejected panel, not a machine adjustment. Mark its feed direction and grain direction, then inspect it under low-angle light. Check the center, both edges, and the leading and trailing ends. A scratch crossing the grain is not necessarily evidence of a cross-belt problem: skewed feeding, trapped debris, previous machining, or handling can produce similar defects.
- Long grooves following the feed path: inspect for damaged abrasive, loading, or a particle caught at the contact area.
- Repeated diagonal or curved marks: investigate belt tracking, oscillation, contamination, and the actual abrasive travel direction.
- Regular bands across the panel: consider chatter, belt splice impact, vibration, or unstable feeding rather than grit alone.
- Isolated scratches appearing after unloading: check transfer rollers, stacking surfaces, and handling practices.
Compare the surface before and after each accessible processing stage, using only the machine’s approved operating procedure. Never defeat guards to inspect a running sanding head. Isolate and lock out the machine before touching belts, rollers, platens, or internal components.
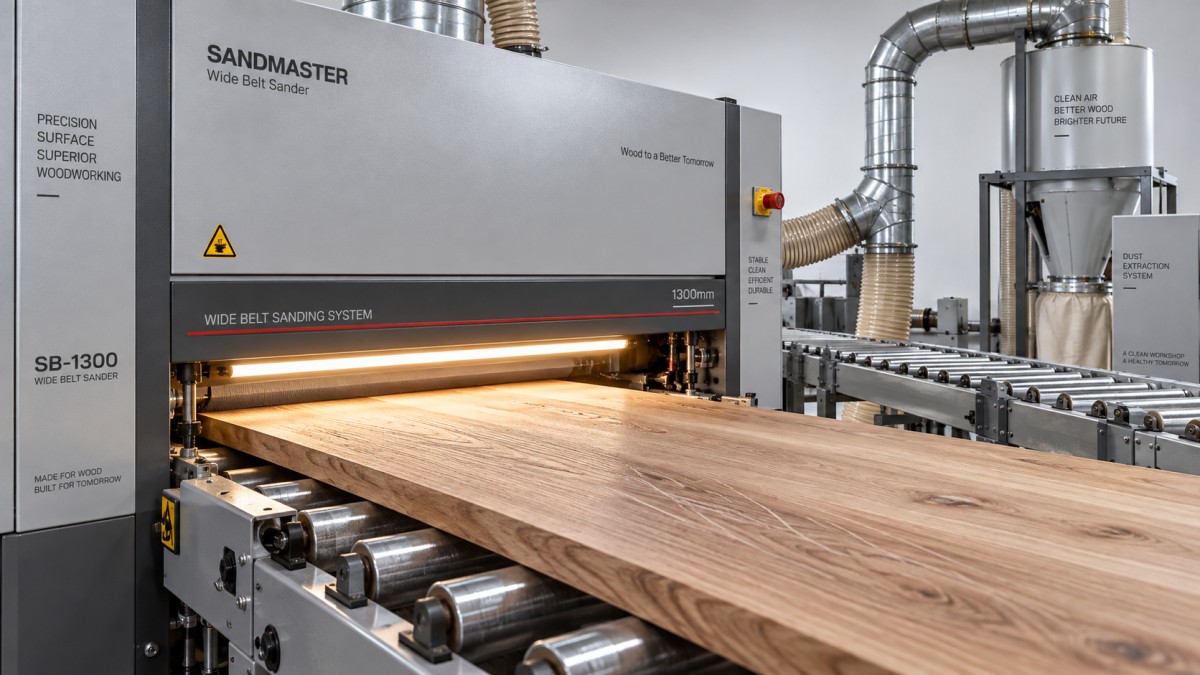
Check abrasive condition before moving to a finer grit
A nominally fine belt can leave deep marks if resin and sanding dust have formed hard deposits on its surface. Instead of cutting evenly, those deposits drag across the wood. A damaged belt edge, defective splice, or stray coarse grain can create a similar problem.
With the machine safely isolated, examine the full belt width. Look for shiny loaded patches, torn edges, uneven wear, and localized damage. Confirm that belt dimensions, backing, joint construction, installation direction where specified, and tension suit the machine. Clean or replace the abrasive according to the belt supplier’s instructions; aggressive improvised cleaning can damage it.
If a fresh, correctly specified belt removes the defect, do not stop at “the old belt was worn.” Check why it loaded or deteriorated. Excessive removal, resinous stock, inadequate extraction, or unsuitable abrasive construction may recreate the problem during the next batch.
Store belts clean and dry under the supplier’s recommended conditions. Keep coarse abrasive debris away from finishing belts and inspection benches. Contamination can undo an otherwise correct sanding sequence.
Give every grit enough work—but not too much
Fine sanding must remove the scratch pattern from the previous stage. It cannot reliably hide deep grooves left by an overloaded coarse belt. If the final head is expected to correct heavy calibration marks, increasing its pressure usually creates heat and wear before it produces a consistent surface.
As a trial sequence, an operator might evaluate P80, P120, and P150 abrasives where the incoming surface and finish specification justify them. This is an example, not a universal recipe. Planed stock needing light preparation may require a different starting grit; rough or uneven panels may need a separate calibration operation.
Use abrasives identified under a consistent grading system, and inspect between stages. If coarse scratches remain after the intermediate pass, resolve them there. Adding an extra-fine pass at the end often makes the surrounding surface smoother while leaving the original grooves visible.
The final grit also needs to match the coating process. Sanding progressively finer is not automatically better: it can change stain absorption and color development. Approve the sanding sequence against the intended stain and finish on representative offcuts.
Balance feed speed, pressure, and stock removal
On a Solid Wood Sanding Machine, these settings work together. Slower feeding increases contact time, but it can also increase heat and loading. Faster feeding may leave insufficient time to remove the preceding scratches. More pressure can deepen the cut, yet it may also compress fibers, overload the belt, or emphasize uneven contact.
Begin with the manufacturer’s recommended settings for the machine configuration, wood species, abrasive, and operation. Then change one variable at a time. Keep panel thickness and incoming condition comparable, or the trial will not tell you which adjustment mattered.
Measure thickness at repeatable locations before and after sanding. The displayed setting alone does not establish actual removal, especially with warped panels, compressible contact elements, or uneven incoming stock. Keep heavy sizing work separate from final surface preparation wherever the equipment permits.
Uneven results across the width deserve a mechanical check. Inspect platen wear, contact-roller condition, conveyor cleanliness, hold-down performance, and alignment according to the maintenance instructions. A worn contact surface cannot be corrected consistently by adding pressure.
Control grain direction and the final contact pattern
Where practical, feed straight-grained components so the principal sanding scratches follow the grain. However, feeding direction alone does not determine the scratch pattern. Abrasive travel, belt oscillation, head configuration, and panel alignment all matter.
Cross-belt units can be useful for leveling and surface preparation, but visible transverse scratches must be removed by the following operation. Check that the downstream longitudinal or finishing head has suitable abrasive condition and enough controlled removal capacity. Do not assume a finishing head is correcting the surface simply because it is running.
Frame-and-panel parts, parquet patterns, and glued panels with changing grain directions need particular care. No single feed direction follows every grain section. Depending on the equipment and finish requirement, a controlled orbital finishing stage or light manual sanding may be appropriate.
Manual correction should remain a defined finishing step, not an unlimited repair allowance. Use a clean abrasive and suitable backing, work with the grain where possible, and avoid rounding edges or hollowing the area around a scratch.
Treat extraction and handling as part of sanding quality
Dust extraction affects more than housekeeping. Poor pickup can allow particles to remain in the sanding zone, contribute to belt loading, and contaminate the finished face. Check extraction connections, duct restrictions, filter condition, and airflow against the machine and extraction-system requirements. An audible fan is not proof of adequate pickup.
Use approved cleaning methods rather than blowing accumulated wood dust around the machine with compressed air. Follow the site’s dust, fire, and respiratory-protection procedures. Internal cleaning and blockage removal require safe isolation.
Inspect outfeed rollers, carts, separator materials, and stacking tables as well. A clean sanded face dragged across a contaminated support can acquire scratches after it has passed every sanding head. Check panel surfaces immediately at the outfeed and again after transfer to separate machining defects from handling damage.
Keep mixed-material production settings separate
Furniture factories often process solid wood alongside composite and lightweight panels. These operations need distinct setup records, cleaning routines, and acceptance criteria. A feed speed that works for edge processing is not a sanding recommendation.
For example, the Honeycomb Aluminum Panel Edge Banding Machine ZD450G is designed for edge processing of aluminum honeycomb panels and composite boards, with a specified feed range of 13–23 m/min. That specification belongs to its edge-banding application; it neither establishes suitable solid-wood sanding settings nor provides a remedy for face scratches. Keeping those process boundaries clear prevents inappropriate settings from carrying between production lines.
Approve the result under the finish, then record the setup
Touch alone is an unreliable inspection method. A panel can feel smooth while retaining scratches that become obvious after staining. Inspect with consistent low-angle lighting, remove dust using an approved method, and apply the intended finish system to a representative test piece. Do not introduce an unapproved solvent wipe into production simply to reveal marks.
Once the result is acceptable, record the wood species, incoming thickness and condition, abrasive sequence, belt condition, feed speed, head settings, and measured removal. Include a reference sample or photographs taken under consistent lighting. Recheck when changing wood batches, abrasives, or coating systems rather than treating the setup as permanent.
Qingdao Zhongding Machinery Co., Ltd., a woodworking machinery manufacturer and exporter with more than 20 years of industry experience, provides technical support and spare-parts supply alongside its equipment. For a persistent sanding defect, useful support starts with the machine model, head configuration, abrasive details, maintenance history, and clearly marked scratch photographs—not simply a request for a finer belt.
If scratches remain after abrasive replacement and controlled trials, stop compensating with extra pressure. Establish which stage introduces the mark, verify the contact and feeding components, and confirm that the following stage actually removes it. That is a more reliable route to an acceptable finish than repeatedly sanding the same panel thinner.
Send Your Inquiry
We welcome your cooperation and we will develop with you.