


News & Exhibitions
Latest Factory Updates, Industry Trends & Global Exhibition Information
Why Do Side Drilling Machines Drift Out of Alignment on Panel Edges?
Side drilling machine drift causes misaligned panel holes, rework and assembly failures. Learn the common causes and practical checks to restore accuracy fast.
A side drilling machine does one job that looks simple: put a hole in the edge of a panel, exactly where the drawing says, at the right depth, square to the face. When it works, nobody thinks about it. Dowels slide in, connectors pull tight, a cabinet carcass squares up on the first try. When it drifts, the symptoms show up everywhere except at the machine itself. And the machine keeps drilling, a fraction of a millimetre off, until a whole batch of panels will not assemble cleanly.
The error is usually small, often less than a millimetre, and rarely the same on every hole. Drift has several different causes that look alike on a finished panel, so the useful question is where the position actually comes from.
Where a hole position really comes from
Every hole a side drilling machine makes is located by three things at once: the panel's reference edge against the fence, the panel's face against the table, and the drill spindle's position relative to those two surfaces. If any one of them moves, the hole moves with it. A worn fence, a panel that is not sitting flat, and a spindle with play in it can each produce the same visible result, a hole off centre on the edge, but they need completely different fixes.
Think of the machine as a chain. The fence sets the distance from the edge. The table sets the height of the hole in the thickness of the panel. The spindle sets the angle and the depth. A fault anywhere in that chain shows up as drift, and it often grows slowly, a tenth of a millimetre at a time, until assembly starts failing. Measure the machine against a known reference, one element at a time, using a panel you have already checked for flatness and squareness.
The reference edge is usually the first suspect
Most drift on panel edges starts at the fence, because the fence is the surface the operator trusts without thinking. A panel is pushed against it, the clamp comes down, the drill runs. If the fence face is worn, dented or coated in old glue and dust, the panel does not sit against the true reference plane. It sits against a high spot, or it rocks on a ridge of dried adhesive. The hole is then drilled relative to that false position, and the error repeats on every panel until the fence is cleaned or trued.
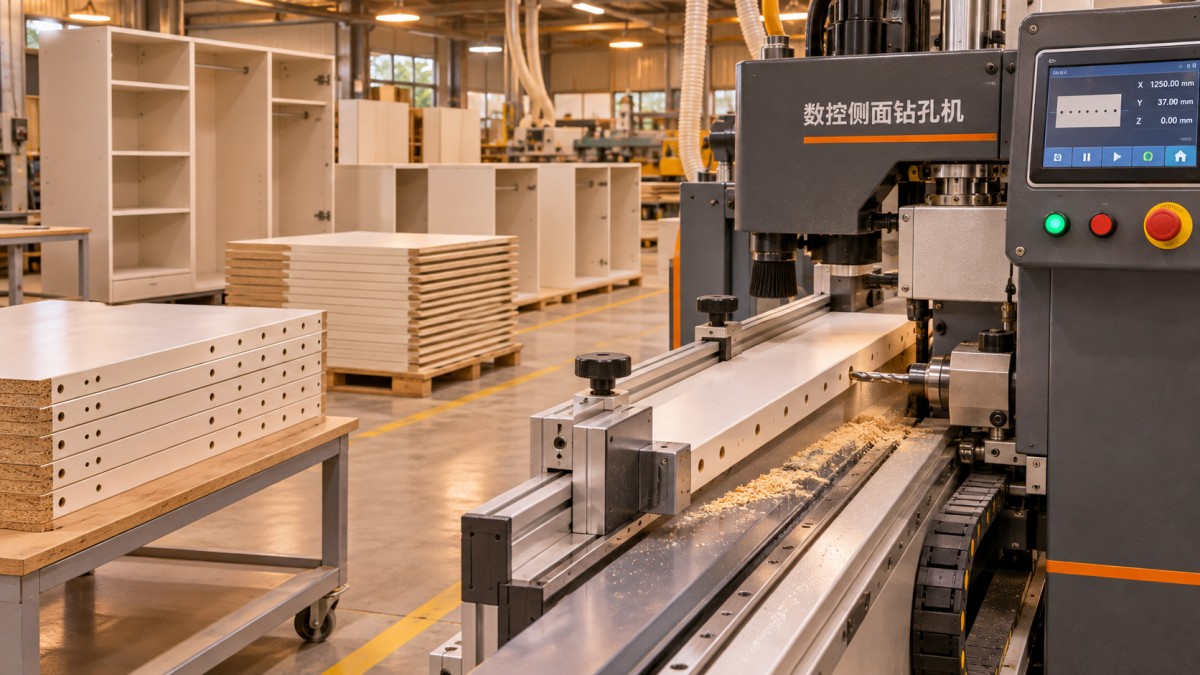
Check the fence with a straightedge and a feeler gauge, not by eye, running it along the full working length and looking for gaps near the centre where panels pass most often. Clean the fence face first, then measure. A surprising number of drift problems end at the cleaning stage. The end stops deserve the same check: a stop that has slipped, or one with a worn contact face, moves the whole hole pattern along the panel, and vibration loosens stops gradually over a shift.
The panel edge is half the reference
A side drilling machine can only be as accurate as the edge it is referenced from. If the panel edge is not straight, or not square to the face, the hole will be drilled in the right place relative to that edge and in the wrong place relative to the finished cabinet. This is the fault that gets misdiagnosed most often, because the machine is doing exactly what it was set to do. Before adjusting the machine, drill a test panel you have checked with a square and a straightedge, and mark which edge was against the fence. If the test panel is accurate and production panels are not, the problem is in the material or the previous operation, not in the drill.
The drill unit: wear you can feel before you can see
When the fence and the panel check out, the next place to look is the drill unit. A dull or damaged bit does not just cut slowly. It deflects. As the bit enters the panel edge, a worn cutting edge pushes it sideways and the hole wanders. The effect is worse in dense board and in panels with a hard surface layer. If holes drift more at the start of a batch and less after a bit change, the bit was the problem all along.
Spindle runout is the quieter version of the same fault. A spindle with worn bearings, a chuck that no longer grips true, or a bit that is not seated fully will drill a hole that is slightly oversize and slightly off position, and the error changes with speed and feed. Feel for it by turning the spindle by hand with the machine isolated and the bit removed. It should turn smoothly, with no gritty spots and no side play you can detect by hand. Any roughness or play is worth reporting.
Depth is a separate problem that often gets lumped in with position drift. A depth stop that has moved, or a feed mechanism that no longer reaches the same stop each cycle, makes some holes too shallow and some too deep. Check depth with a depth gauge on a test panel, not by looking at the stop setting. The setting and the result are two different things.
Clamping, dust and the panel that moves mid-cycle
A panel that moves while the bit is in the cut will always produce a bad hole, and the movement is usually small enough that the operator does not notice it. Too little clamping pressure and the panel shifts as the bit bites, especially on the first hole, when the bit is pushing the panel away from the fence. Too much pressure and a thin or flexible panel bows between the clamps, then springs back after drilling, carrying the hole with it. The right pressure holds the panel flat against the table and firmly against the fence without bending it, and it is not the same for an 18 mm panel and a 12 mm one.
Dust and chips are the other hidden cause. A layer of fine dust under a panel lifts it by a fraction of a millimetre, enough to move the hole off centre in the thickness. Chips caught between the panel edge and the fence do the same in the other direction. Extraction that works well at the start of a shift and poorly by the afternoon, because a hose is partly blocked or a bag is full, produces drift that seems to appear out of nowhere in the middle of a batch. Blow out the work area, check that extraction is actually pulling at the drill head, and wipe the table and fence between batches. Feed rate plays a part too: pushing the bit in too fast makes it deflect.
A diagnostic sequence that finds the fault in order
The fastest way to fix drift is to work through the machine in the order the hole position is created, and to change only one thing at a time. Start with the panel, then the fence, then the clamp, then the drill unit. At each step, drill a test panel and measure it before moving on. If the test panel is right, stop. Adjusting a good machine to compensate for a bad panel or a worn bit only creates a second fault that will show up on the next job.
A ten-minute test is enough to separate most of these. Take one checked panel, drill the normal pattern, and measure each hole with calipers: its distance from the reference edge, its centre height in the thickness, and its depth. Write the numbers down. A constant offset means a setting has moved. A growing error along the panel means something is flexing or the fence is not straight. A random error means something is moving during the cut, which points to the bit, the clamp or the dust. Without the numbers, every fault looks the same. Measure the first panel of a batch and one in the middle.
When the panel is the problem, not the machine
Panel material deserves its own check, because it is the one variable the machine cannot control. Boards stored on edge, or stacked unevenly, can bow enough to lift off the table in the middle. Thickness variation matters too. A batch of nominally 18 mm board that actually ranges from 17.6 to 18.4 mm will show holes that seem to wander in the thickness, even when the machine is set correctly for the middle of the range. In that case the fix is not a machine adjustment but a decision: set the machine to centre on the measured average, sort the panels by thickness, or take the issue back to the supplier.
Keeping it aligned after the fix
Fixing drift once is not the same as keeping a side drilling machine accurate. The parts that cause drift wear gradually, so the checks need to be regular rather than reactive. A short weekly routine covers most of it: clean the fence and table, check the fence with a straightedge, check the end stops against a scale, inspect the bits, and drill one test panel and measure it. That routine takes less time than reworking one bad cabinet.
Replace bits on condition, not on a calendar, but do not wait until they are clearly blunt. A bit that has started to deflect is already producing bad holes, and it will also load the spindle harder, which shortens the life of the bearings. Training matters as much as maintenance. An operator who checks the first panel of a batch as a matter of habit will catch drift early. Show new operators how to measure a hole, how to recognise a worn bit, and when to stop the machine and ask for help instead of adjusting a setting they do not understand. The most expensive adjustments are usually the ones made in a hurry, without a measurement.
Qingdao Zhongding Machinery Co., Ltd. has worked with furniture makers and panel workshops for more than 20 years, and the pattern is familiar from many installations: the machine that drifts is rarely the machine that is broken. More often it is a fence that needs cleaning, a bit that needs changing, or a panel that was never square in the first place. The suppliers who help most are the ones who will talk through the diagnostic sequence with you and supply the wearing parts and bits to keep the machine true.
Drift on panel edges is fixable, and it is usually fixable fast, once the fault is located properly. Start with a measured test panel, work through the reference edge, the clamp and the drill unit in order, and change one thing at a time. When the test panel measures right, stop adjusting. Then write down what was wrong and what fixed it, so the next time the holes start to wander, the answer is already on the wall beside the machine.
Send Your Inquiry
We welcome your cooperation and we will develop with you.