


News & Exhibitions
Latest Factory Updates, Industry Trends & Global Exhibition Information
Why does stock slip on a single blade rip saw with feeder?
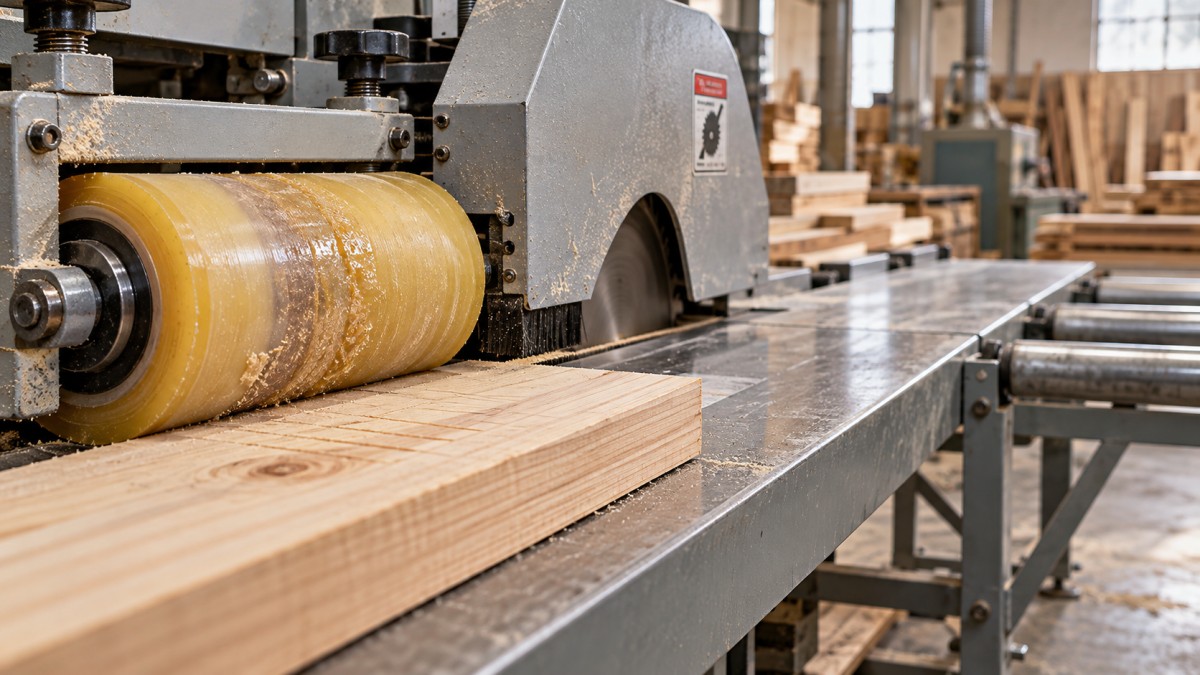
Stock slips on a single blade rip saw with feeder when the feed system cannot maintain enough traction to overcome cutting resistance and friction along the stock path. Insufficient hold-down pressure, worn or contaminated rollers, uneven timber, and excessive cutting load are common causes. The visible result may be stop-start movement, roller marks, burning, or an uneven rip cut, with an increased risk of kickback.
The first distinction is whether the feeder keeps moving while the board stalls, or whether the feeder itself slows or stops. The former points toward loss of grip or excessive resistance; the latter may indicate a drive, overload, or control problem. Before inspecting, cleaning, or adjusting anything, stop the saw, isolate all relevant energy sources, and follow the manufacturer’s lockout procedure. Never push harder against a stalled board or reach toward the blade to restore feeding.
Identify what is actually slipping
Use observations from the incident rather than deliberately recreating an unsafe stall. Note when movement became irregular: as the stock entered the feeder, when it reached the blade, or as its trailing end left the infeed support. Each timing pattern narrows the investigation.
Feeder designs differ. Some machines use rubber or polyurethane rollers; others use serrated rollers, powered chains, or a combination of feed and hold-down components. Apply the following checks to the installed mechanism, not to an assumed layout.
Restore contact before increasing pressure
Clean the surfaces that transmit feeding force
Sawdust, resin, and oily contamination can reduce grip even when rollers appear to press firmly on the stock. With the machine isolated, inspect the roller contact surfaces, accessible feed components, and table. Packed debris can also interfere with the movement of a spring-loaded hold-down, preventing it from following thickness changes.
Use cleaning methods and products approved for the machine and roller material. An unsuitable solvent may damage an elastomer roller, while an oily cleaner can leave a slippery film. Do not apply wax, lubricant, or grip-enhancing treatments to feed surfaces unless the manufacturer explicitly permits them. Restore dust extraction as well; cleaning alone will not last if debris immediately builds up again.
Check wear and freedom of movement
A polished roller may have lost useful grip without showing obvious chunks or cracks. Look for glazing, rounded serrations, uneven diameter, damaged tread, or flat areas. Uneven wear can leave one roller carrying most of the load while another barely contacts the board.
Inspect hold-down pivots, springs, and adjustment mechanisms according to the maintenance instructions. A seized assembly can produce adequate pressure at one thickness but lose contact over a thinner section. Replace worn parts with the specified type; changing roller hardness or profile can alter both traction and stock marking.
Set pressure for the actual stock thickness
Insufficient pressure lets the feed surface slide over the wood. Excessive pressure can crush soft fibers, leave deep marks, increase friction against the table, or overload the feeding mechanism. More pressure is therefore not a universal correction.
Measure representative boards, including thinner sections, rather than relying on the nominal timber size. Set feeder height and hold-down pressure using the machine’s specified procedure. Check that adjustable supports are secured and that the feeding assembly remains in its intended position under load. There is no safe universal pressure or roller-compression setting for every machine, timber species, and roller design.
Check whether the board can maintain stable contact
A bowed board may touch the table and feeder only at isolated points. Twisted stock can rock as it advances, briefly unloading a roller. Large thickness variations create a similar problem: a setup that grips the thick section may lose traction when the thinner section arrives.
Inspect the boards that slipped alongside stock that previously fed normally. Compare thickness consistency, straightness, surface contamination, and contact-face condition. Resinous patches, loose bark, or a finish on reclaimed timber may affect grip. Do not assume all rough surfaces provide better traction; loose fibers can detach and accumulate on feed components.
Stock must also meet the machine’s stated minimum length, width, and thickness requirements. A short piece may leave one feeding element before the next has established control. Narrow stock may not engage the intended hold-down area. Increasing pressure does not make an undersized workpiece suitable for the machine.
Long or heavy boards need support that keeps them stable without changing their intended path. An outfeed support set too high can lift the stock away from the table or create resistance; one set too low can let the board tip as its weight transfers. Arrange supports according to the machine instructions, and do not have someone pull the stock through from the discharge end.
When slipping starts at the blade, investigate resistance
A feeder can grip adequately before cutting yet slip as soon as the teeth enter the timber. That pattern does not prove the pressure is too low. The blade, feed setting, or stock may be creating more resistance than the system should handle.
Inspect the blade and its suitability
Dull teeth, resin deposits, damaged cutting edges, or an unsuitable blade specification can raise cutting force. Burning and heavy scoring alongside slipping strengthen the case for inspecting the cutting system, although those marks alone do not identify the cause.
With power isolated and the blade stopped, arrange inspection or replacement according to the manual. Confirm that the blade is suitable for ripping the material and is compatible with the machine’s diameter, bore, speed, kerf, and associated safety-device requirements. A blade that physically fits is not necessarily an acceptable blade. Damaged blades should not be returned to service simply because reducing feed speed makes cutting possible.
Match feed rate to the cutting conditions
Thicker, denser, or difficult-grained stock may require a different feed setting from thinner, easier-cutting material. Excessive feed can produce high cutting resistance, drive overload, or traction loss. However, feeding too slowly can cause rubbing, heating, and burning, depending on the blade and operating conditions.
Use the approved operating range for the installed blade, material, and machine. Change one permitted setting at a time so its effect can be identified. Do not change blade speed or override protective controls as a workaround for slipping.
Look for binding rather than just poor grip
Internal stress in solid timber can close the kerf behind the blade, causing the stock to pinch or bind. A board that begins feeding normally but becomes difficult to advance partway through the cut may have this problem. It can occur even with clean rollers and a sharp blade.
Confirm that the machine’s specified riving knife, splitter, anti-kickback devices, and guards are correctly installed and serviceable. Their arrangement depends on the machine design. Never remove these components to reduce resistance. Suspected kerf closure or repeated binding calls for a review of the stock and cutting method before another attempt.
Alignment can make a strong feeder appear weak
A misaligned feed path can drive the board against the fence or force it sideways through the cut. The feeder then spends part of its available force overcoming lateral friction. Possible clues include persistent fence-side rubbing, uneven roller tracks, stock wandering, or burning concentrated along one side of the cut.
Check fence security, table condition, and feeder mounting for looseness or movement. The feed direction and any intentional bias toward the fence must follow the manufacturer’s setup requirements. Do not copy an angle from another machine: integrated feeders and separately mounted power feeders may require different arrangements.
Blade-to-fence alignment and internal feed-system alignment should be checked using the specified reference points and method. Where adjustment requires opening guarded drive areas or moving factory-set components, involve qualified maintenance personnel. Guessing at alignment can introduce binding even if the original slipping seems to improve.
Return to cutting with a controlled verification
After correcting an identified fault, verify the setup rather than immediately resuming a full batch. Keep the sequence deliberate:
- Complete the isolated checks. Confirm that tools and cleaning materials are removed, adjustments are secured, and guards and safety devices are restored.
- Select suitable stock. Use a straight, sound board within the machine’s permitted dimensions and representative of the intended work. Do not use the previously jammed piece as a test.
- Follow the prescribed restart procedure. Keep people clear of the discharge and kickback paths, and use the normal guarded operating position.
- Observe without intervening. Assess feeding consistency, abnormal noise, visible marking, and overload indications only from safe positions. Stop if irregular feeding returns; do not reach in or supplement the feeder by force.
- Inspect after stopping. Check the cut and stock surfaces once safe access is established. Before further cleaning or adjustment, isolate the machine again.
A successful check means more than getting the board through. Feeding should remain consistent through entry, cutting, and exit, without unexplained stalling, excessive indentation, burning, or sideways movement. Record the stock dimensions, blade identification, permitted feed setting, and adjustment made so that a recurring fault can be compared against a known setup.
Signs that adjustment should stop
Remove the machine from service if the feeder repeatedly stops, a mounting shifts, hold-down parts fail to return, drive components make abnormal noises, or electrical protection trips. The same applies when slipping continues despite clean contact surfaces, suitable stock, correct settings, and a serviceable blade. These symptoms require diagnosis beyond routine pressure adjustment.
For technical support, provide the machine model, feeder type, stock dimensions and condition, blade details, and the exact point where feeding becomes irregular. Distinguish “rollers turn while stock stops” from “the feed drive stops.” That observation helps maintenance personnel separate a traction problem from a drive fault or cutting obstruction without another unsafe trial.
Send Your Inquiry
We welcome your cooperation and we will develop with you.