


News & Exhibitions
Latest Factory Updates, Industry Trends & Global Exhibition Information
Hot Wood Pressing for Acoustic Wood Panels: Settings for Stable Bonding
When acoustic wood panels leave the press with lifted veneer edges, uneven adhesion, telegraphing marks, or warped faces, the immediate temptation is to raise the temperature or add more pressure. That response can make the defect worse. In acoustic-panel production, the pressing cycle has to bond the decorative layer, core, backing, and any perforated or slotted structure without crushing the panel, creating glue starvation, or trapping moisture.
The practical answer is to set a hot wood press for acoustic wood panels around the adhesive system, panel construction, and actual platen conditions rather than relying on one universal temperature-pressure-time combination. Stable bonding usually comes from moderate, even pressure; sufficient heat to bring the glue line to its curing range; enough dwell time for the panel center to heat through; and controlled cooling before handling. The correct settings should be confirmed with trial panels made from the same materials and moisture condition as production material.
Why acoustic panels react differently in the hot press
A standard veneered board can often tolerate a comparatively simple pressing routine because its surface is continuous and its internal structure is uniform. Acoustic wood panels are more sensitive. They may combine perforated MDF, grooved board, slatted substrates, polyester-fiber backing, sound-absorbing felt, decorative veneer, laminates, or edge treatments. Each layer transfers heat and pressure differently.
Perforations and grooves reduce local support under the decorative face. A press platen that applies a nominally uniform force can still produce concentrated load around holes, slots, raised battens, or panel edges. Thin veneers may then sink slightly into unsupported areas, show press marks, or crack after cooling. Panels with felt backing can also compress unevenly, which affects thickness and can change the intended acoustic construction.
Adhesive behavior adds another variable. A glue that cures properly on a dense, flat panel may set too quickly on a thin veneer, penetrate too deeply into an open-core substrate, or fail to receive enough heat at the center of a thicker acoustic assembly. The production objective is not simply the strongest possible initial bond. It is a repeatable bond that remains stable after trimming, machining, packing, transport, and installation.
Start with the glue line, not the press control panel
Before defining press settings, identify what must happen at the adhesive line. The adhesive supplier’s technical guidance should be treated as the operating boundary, particularly for minimum curing temperature, open time, assembly time, spread rate, and required pressure. A hot press cannot compensate for a glue mix that has aged too long, a spread pattern that misses areas near grooves, or a material surface contaminated with dust.
For project planning, separate these three stages:
- Open assembly time: the period after adhesive application during which the materials can be positioned without the glue losing necessary transfer and wetting ability.
- Closed assembly time: the period after components are brought together and before pressing begins. Excessive delay may prevent proper glue contact or cause premature skinning.
- Pressing time: the time under heat and pressure needed for the glue line to reach its cure condition, not merely for the platen to reach the setpoint.
These stages are easy to overlook when production flow is interrupted. A panel may appear visually acceptable immediately after pressing but later delaminate because the adhesive had already lost transfer before the press cycle started. When defects occur intermittently rather than on every panel, track material waiting time along with press settings.
Set temperature based on real platen and bond-line heat
Temperature should be high enough to activate or cure the selected adhesive within a practical cycle, but not so high that it damages veneer, coating, backing, or the panel’s moisture balance. The number displayed on the controller is only useful when it reflects actual platen performance. A platen may have cooler corners, slow recovery after repeated cycles, or a gap between displayed and surface temperature.
Begin by checking whether both platens are heated as intended and whether their surfaces remain reasonably uniform across the working area. Temperature-sensitive strips, a suitable contact measurement method, or other validated shop procedures can reveal whether one zone runs cooler than the rest. A recurring bond failure at the same panel position is often a press-uniformity issue rather than an adhesive issue.
For panels with veneer or thin decorative faces, excessive heat can create several problems: adhesive bleed-through, darkened wood, surface blistering, loss of finish quality, or excessive moisture movement. On grooved and perforated panels, high heat can also accelerate curing at the surface while the deeper glue line remains below its needed cure condition. Raising platen temperature is therefore not always the fastest way to shorten cycles.
A more reliable approach is to verify heat transfer through the whole panel stack. Consider panel thickness, core density, backing material, cauls, release sheets, and any protective boards between the platen and workpiece. Every added layer changes the time required for heat to reach the bond line. When a process includes a caul plate to protect the face, the press schedule should account for the caul’s thermal mass rather than using the cycle for direct pressing.
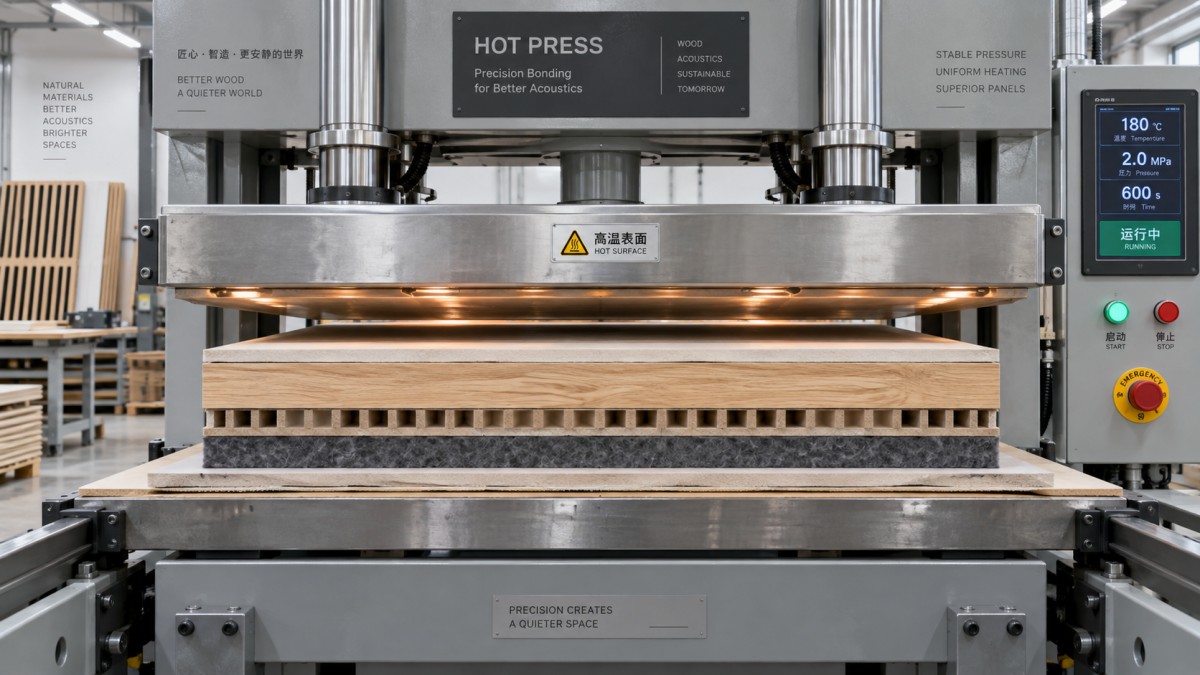
Use pressure to create contact, not to squeeze out the adhesive
Pressure has one main purpose: bring mating surfaces into intimate, even contact while the adhesive cures. It should not be treated as a general cure accelerator. Excess pressure can force adhesive out of the bond line, particularly with low-viscosity systems or porous substrates. The result may be a dry-looking glue line with poor resistance to later stress. Too little pressure, on the other hand, leaves gaps where veneer, laminate, or backing has not fully contacted the core.
Acoustic panels require special attention because their geometry creates zones with different support. The solid sections beside slots may receive force differently from the sections above grooves or perforations. A rigid, flat caul can help distribute pressure, but it must suit the panel design. A caul that bridges unsupported areas may protect the surface in one configuration and introduce local marking in another.
Press pressure should be evaluated as pressure at the panel surface, not only hydraulic system pressure. The relationship depends on cylinder area, platen area, number of panels loaded, and whether panels are pressed individually or in a stack. Changes in panel size can therefore change the actual load applied to each workpiece even when the machine setting is unchanged.
Determine pressing time from the slowest-heating section
Pressing time is often set from a previous board type and then carried into a new acoustic panel project. That creates risk whenever thickness, backing, adhesive, veneer species, or groove pattern changes. The limiting point is normally the slowest-heating part of the assembly, which may be the center of a thick core, an area insulated by felt, or a section beneath a caul.
Use a controlled trial sequence rather than changing several settings at once. Keep adhesive preparation, spread method, panel conditioning, and loading arrangement consistent. Then adjust one primary variable and inspect panels after they have cooled. Immediate appearance is not enough. A bond can seem satisfactory while warm but show movement, springback, or edge separation later.
For each trial, record:
- panel construction, thickness, face material, and backing type;
- material moisture condition and workshop environment at the time of pressing;
- adhesive type, mix condition where applicable, and application method;
- platen set temperature and any measured surface-temperature variation;
- actual panel pressure, pressing duration, and loading position;
- cooling and handling time before trimming, stacking, or inspection;
- bond observations at the face, edges, grooves, and perforated areas.
This record is especially valuable for a project team moving from sample approval to volume production. A sample panel pressed slowly in a lightly loaded machine may not represent the thermal conditions of continuous shifts. As production pace rises, platen recovery, material staging, and loading consistency become part of the bond-control process.
Material condition can defeat otherwise correct settings
Wood-based cores and veneers respond to moisture changes. A panel that is too wet may generate vapor under heat, leading to bubbles, blisters, or internal stress. An overly dry veneer can become brittle and may crack around grooves, perforations, or edge profiles. Uneven moisture between the face veneer and core can contribute to bowing after the panel leaves the press.
Condition materials in the same production environment where practical, and avoid mixing recently delivered stock with material that has been stabilized in the workshop without checking its condition. Moisture variation is often mistaken for a press problem because the visible defect appears after pressing. The clue is inconsistency between batches processed with the same machine parameters.
Surface preparation matters just as much. Dust from grooving or perforating can remain inside recesses and along edges, reducing glue contact. A panel may pass a casual visual check yet have contaminated areas where the decorative layer does not fully bond. Cleaning procedures should focus on the actual bonding surface, including machined channels and porous edges, rather than only the visible face.
Protect the acoustic design during loading and unloading
Panel orientation should be defined before production starts. Some constructions have a preferred press direction because the face veneer, grooves, backing, and caul arrangement respond differently under load. Reversing panels during a busy shift can produce unexplained variation. Simple orientation marks on the carrier or loading fixture can prevent this.
Use separators, cauls, release materials, or compliant pads only when they are compatible with the surface and adhesive process. Their condition should be inspected regularly. A damaged caul, hardened release sheet, trapped chip, or adhesive buildup can imprint the panel face and create local pressure differences. Reusing a protective layer beyond its effective condition often costs more in rework than replacement.
After the press opens, do not assume the panel is ready for aggressive handling. Warm assemblies can retain internal stress and may be more vulnerable to bending, edge damage, or bond movement. Support the panel evenly during transfer. Stack it on a flat base with suitable separation where required by the construction, and allow sufficient cooling before machining, packaging, or quality evaluation.
When a defect appears, avoid changing all settings at once
A disciplined troubleshooting sequence prevents wasted production time. First, identify whether the failure is localized or random. A defect repeatedly found near one corner points toward platen temperature, pressure distribution, caul condition, or loading position. Failures occurring across different locations but only in one material batch may point toward moisture, surface preparation, adhesive age, or core variation.
Edge lifting and partial delamination
Check adhesive coverage at the edge, closed assembly time, panel flatness before loading, and pressure contact at the perimeter. Do not immediately raise pressure. Edge lifting can result from a warped substrate that never achieved even contact, or from an adhesive that skinned before pressing. Inspect whether the decorative layer is being trimmed or stressed before the bond has cooled and stabilized.
Blisters, bubbles, or surface distortion
Look for excess moisture, overly rapid heating, trapped air, excessive adhesive application, or incompatible protective layers. Blisters concentrated over perforated zones may indicate uneven support or vapor movement through the panel structure. Lowering heat slightly and extending dwell time can sometimes improve control, but only after confirming that the adhesive still reaches its cure requirement.
Bond looks good initially but fails later
This pattern often indicates incomplete curing, glue starvation, poor material conditioning, or post-press stress. Review the actual bond-line temperature and not only the press display. Also examine cooling practice. A panel moved, bent, trimmed, or stacked while still hot may be subjected to stress before the adhesive and wood-based components have stabilized.
Build a repeatable production window
The most useful output from trials is not a single “perfect” setting. It is a defined operating window: acceptable platen temperature range, target pressure, permitted cycle-time range, maximum assembly delay, material-condition requirements, approved caul arrangement, and inspection points. This gives the production team room to operate consistently while making it clear when a change in panel design or material requires revalidation.
For a hot wood press for acoustic wood panels, stable bonding depends on controlling the whole stack rather than pushing one parameter to an extreme. Confirm adhesive readiness, verify actual heat and pressure distribution, support delicate acoustic structures, and evaluate panels after cooling. That approach reduces the chance that a visually acceptable panel becomes a costly quality issue later in the project.
Send Your Inquiry
We welcome your cooperation and we will develop with you.