


News & Exhibitions
Latest Factory Updates, Industry Trends & Global Exhibition Information
Woodworking Machine Maintenance: Preventing Common Bearing Failures
A spindle that becomes unusually noisy during a production run, or a conveyor roller that feels hotter than its neighbors, may be signaling a bearing problem before the machine stops. Continuing to operate can damage the shaft or housing as well as the bearing, turning a component replacement into a longer repair.
The most effective response is to isolate the machine, identify the affected bearing, and investigate contamination, lubrication, loading and alignment before fitting a replacement. In maintenance machines bois work, replacing the bearing without correcting its operating conditions often leaves the original cause in place.
Start with the symptom, not the replacement part
Bearing noise does not always identify the failed component. Belts, cutters, guards and loose fasteners can produce sounds that travel through a machine frame. Compare the suspect location with a similar operating point when possible, and note the machine speed, load and production conditions when the symptom appears. A sound that changes with belt tension or cutting load is a useful clue, but it is not proof of bearing damage.
- Rumbling or grinding: May indicate damaged rolling surfaces or contamination. Inspect the lubricant and bearing after safe disassembly.
- High or rising temperature: Can result from insufficient or excessive grease, incorrect fit, preload, misalignment or loading. Compare readings taken at the same housing location under similar conditions.
- Increasing vibration: Check bearing condition alongside tooling balance, shaft condition, coupling alignment and mounting security.
- Grease leakage or discoloration: Look for a damaged seal, incompatible lubricant, overheating or contamination. The appearance alone does not establish the cause.
- Play or rough rotation: With the machine isolated and stored energy controlled, check according to the equipment procedure. Some bearing arrangements have specified clearance or preload, so do not judge movement without the relevant limits.
Stop the machine promptly if there is severe noise, a rapidly rising temperature, smoke, or evidence that a shaft or housing is moving abnormally. Record the symptoms before dismantling: their relationship to speed, load and temperature can be lost once the machine is stopped.
Make the machine safe before opening a housing
Isolate electrical power and apply the site’s lockout procedure. Verify that movement has stopped and that the machine cannot restart. Control other stored energy as applicable: hydraulic pressure, pneumatic pressure, springs, raised components and gravity-loaded assemblies can remain hazardous after electrical isolation. Support elevated parts with approved mechanical restraints; do not rely on hydraulic pressure alone.
Allow hot components to cool before handling them. Clean the exterior around the bearing housing before opening it, so accumulated dust cannot fall directly into the assembly. Photograph the arrangement or mark component positions where appropriate, and prepare a clean surface for removed parts. Keep seals, spacers and retaining components in order; their orientation may affect the bearing fit or lubrication path.
For enclosed spindles or bearing units with factory-set preload, check the machine documentation before disassembly. Some assemblies require special tooling and measuring procedures. An improvised repair can alter spindle accuracy or create a new failure even when the replacement bearing is the correct size.
Find out how contamination entered
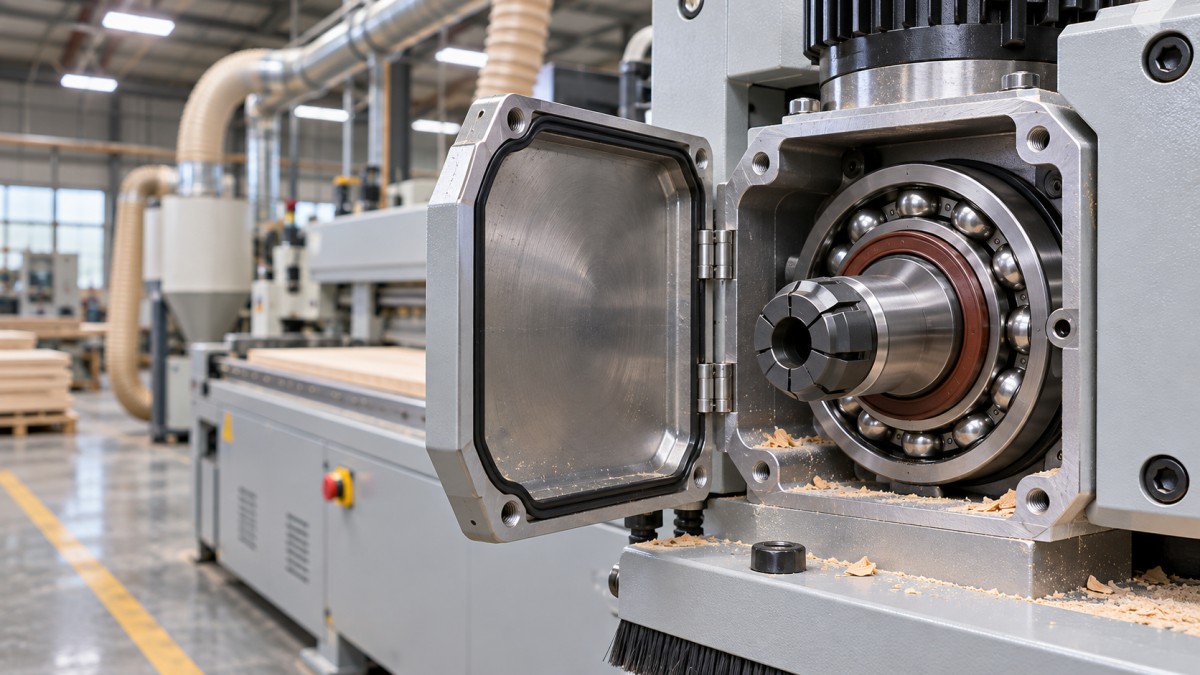
Wood dust is a persistent threat around saws, sanding equipment, routers and conveyors. Fine particles can mix with grease to form an abrasive paste, while cleaning liquids or condensation can promote corrosion. A dusty exterior does not automatically mean the inside of a sealed bearing is contaminated; inspect the seal condition and the lubricant before drawing that conclusion.
Look for damaged or displaced seals, open housing covers, blocked drain or relief passages, and gaps around shaft entries. Check whether dust extraction is functioning at the source and whether buildup is being pushed against the bearing housing by airflow or rotating components. Avoid directing compressed air at seals: it can force debris farther into gaps and spread dust into nearby equipment.
When a removed bearing contains debris, inspect adjacent components as well. A worn shaft surface, damaged seal seat or loose housing cover may allow contamination into the new assembly. Clean the housing and lubrication passages with methods compatible with the machine and lubricant specifications; keep cleaning fluid away from electrical equipment and components that cannot tolerate it.
Water exposure deserves a separate check. Washdown practices, coolant leaks where applicable, and condensation can leave rust marks or cloudy lubricant. Correct the source and replace compromised seals or lubricant as specified. Simply adding grease over contaminated material does not reliably remove water or particles.
Correct the lubrication practice
Before adding grease, establish whether the bearing is actually designed for relubrication. A sealed-for-life bearing should not be modified or forcibly greased. For serviceable bearings, use the lubricant type, quantity and interval specified for the bearing and machine. Speed, temperature, load and the housing design all affect those instructions; a single shop-wide greasing interval is rarely a dependable substitute.
Too little lubricant can leave rolling surfaces inadequately separated. Too much can also create problems: excess grease may churn, raise temperature or damage seals. A blocked relief path can prevent old grease from escaping as intended. Follow the specified procedure for access and relief, and never assume that pumping until grease appears at a seal is acceptable.
Clean grease fittings before connecting the gun. Use a clean, identified dispensing tool and record what was applied. Mixing greases without confirming compatibility can change consistency or reduce performance; when the existing lubricant is unknown, establish an approved cleaning and changeover procedure rather than adding a different product by guesswork.
A sudden temperature increase immediately after lubrication does not automatically mean the bearing has failed. Confirm the amount added, check for a blocked relief path and compare behavior with the equipment instructions. If temperature continues to rise or approaches the manufacturer’s limit, stop and investigate rather than waiting for it to stabilize.
Inspect fit, alignment and load before reassembly
A bearing may fail because the shaft, housing or connected drive forces it to operate outside its intended conditions. Examine seats for scoring, fretting, corrosion and signs of a ring turning where it should be stationary. Measure the shaft and housing against the relevant drawing or manufacturer’s tolerances. A bearing that slides onto a damaged seat is not necessarily easy to service; the fit may no longer retain or support it correctly.
Check shaft straightness, housing seating faces and the condition of mounting bolts. On belt-driven equipment, set belt tension and pulley alignment to the machine specification. Excess tension adds radial load, while poor alignment can load the bearing unevenly. Couplings should also be aligned using the prescribed method rather than judged only by eye.
Do not remove shims or change spacer positions without understanding their function. They may set alignment, axial location or preload. Similarly, a bearing arrangement may require one position to accommodate thermal expansion; unintentionally locking both ends can create excessive axial load as the shaft warms.
Press equipment requires attention to moving guides, pivots and drive components as well as rotating bearings where fitted. For example, a Wood Veneer Hot Press Machine uses heat and hydraulic pressure to laminate veneer onto wood-based panels. Its service plan should follow the actual components and instructions for the machine; bearing checks should not be assumed to replace inspection of its hydraulic system or pressing structure.
Install a replacement without damaging it
- Confirm the specification. Match the bearing designation and any required clearance, seal, cage and precision characteristics. Physical size alone is not enough, particularly for spindle applications.
- Keep the assembly clean. Leave the new bearing protected until installation. Check the shaft, housing, spacers and seals for damage and remove debris from the work area.
- Use the correct fitting method. Apply mounting force to the ring being fitted, not through the rolling elements. Use suitable tools and the approved heating method where an interference fit requires it; avoid direct flame and uncontrolled heating.
- Restore the specified arrangement. Refit retainers, spacers, seals and lubrication components in their correct orientation. Set clearance, preload and fastener torque only as specified.
- Turn and inspect. Where the machine procedure permits, rotate the assembly by hand after installation. Investigate binding, contact with guards or abnormal resistance before energizing.
Keep the removed bearing until the failure investigation is complete. Discoloration, pitting, corrosion, debris and wear on the rings can help distinguish a lubrication or sealing problem from a damaged fit. Avoid washing away evidence before documenting it. A specialist examination may be appropriate when damage is recurring or the pattern is unclear.
Verify the repair under controlled operating conditions
Reinstall guards and remove tools and temporary restraints in accordance with the restart procedure. Run the machine using the manufacturer’s commissioning instructions, beginning without production load if permitted. Listen for abnormal noise and observe vibration and housing temperature from a safe position. Do not touch rotating parts or bypass guards to obtain a reading.
Bring the machine to its normal operating condition only after the initial check is satisfactory. Take comparable temperature readings at the same accessible point and note ambient conditions, speed and load. Infrared measurements can be affected by the surface and surrounding heat, so a single reading should not be treated as a bearing’s internal temperature. Use the manufacturer’s limits and the established trend to decide whether further investigation is needed.
Record the bearing designation, lubricant, installation work, measurements and suspected root cause in the service history. Schedule a follow-up observation based on the machine’s risk and operating conditions. If the same position repeatedly overheats, loosens or becomes contaminated, stop treating it as a routine bearing change: recheck the shaft and housing measurements, alignment, sealing arrangement and actual loading before returning it to regular service.
Send Your Inquiry
We welcome your cooperation and we will develop with you.