


News & Exhibitions
Latest Factory Updates, Industry Trends & Global Exhibition Information
Why Is My Plywood Sander Leaving Uneven Panel Thickness?
Uneven plywood thickness after sanding usually points to one of two problems: the machine is removing different amounts across the panel, or the incoming plywood is already uneven and the sanding process is not correcting it. A consistent left-to-right taper suggests a machine geometry or support problem; irregular thin spots require closer attention to the panel, abrasive condition, and local sanding pressure.
Increasing sanding pressure is not a reliable correction. It can compress the plywood during the pass, increase removal in vulnerable areas, and cut through the face veneer without producing a flatter panel. The useful starting point is a matched set of thickness measurements taken before and after sanding, with every measurement tied to a known location.
Establish whether the sander is creating the variation
Do not diagnose thickness variation from surface appearance alone. A smooth panel can still be tapered, while uneven color or sanding scratches can make a dimensionally acceptable panel look defective. Measure thickness separately from surface quality and flatness.
Use a calibrated thickness gauge with sufficient throat depth to reach the required locations. A handheld caliper can check edges, but edge measurements alone will miss a thick or thin center. Keep the measuring contact area and force consistent; excessive measuring pressure can affect readings on soft face veneers.
Mark the leading edge, the face being sanded, and the side entering on the machine’s left. Establish a repeatable measurement grid covering both sides, the center, and locations near the leading and trailing ends. Place measurement points far enough from damaged edges to avoid mistaking handling damage for a sanding defect.
Record incoming thickness, outgoing thickness, and the difference at each location:
Local stock removal = incoming thickness − outgoing thickness.
This distinction changes the diagnosis. If the outgoing panel is tapered but removal is reasonably uniform, the taper was largely present before sanding. If one machine-side track consistently loses more material, the process is introducing or increasing the variation.
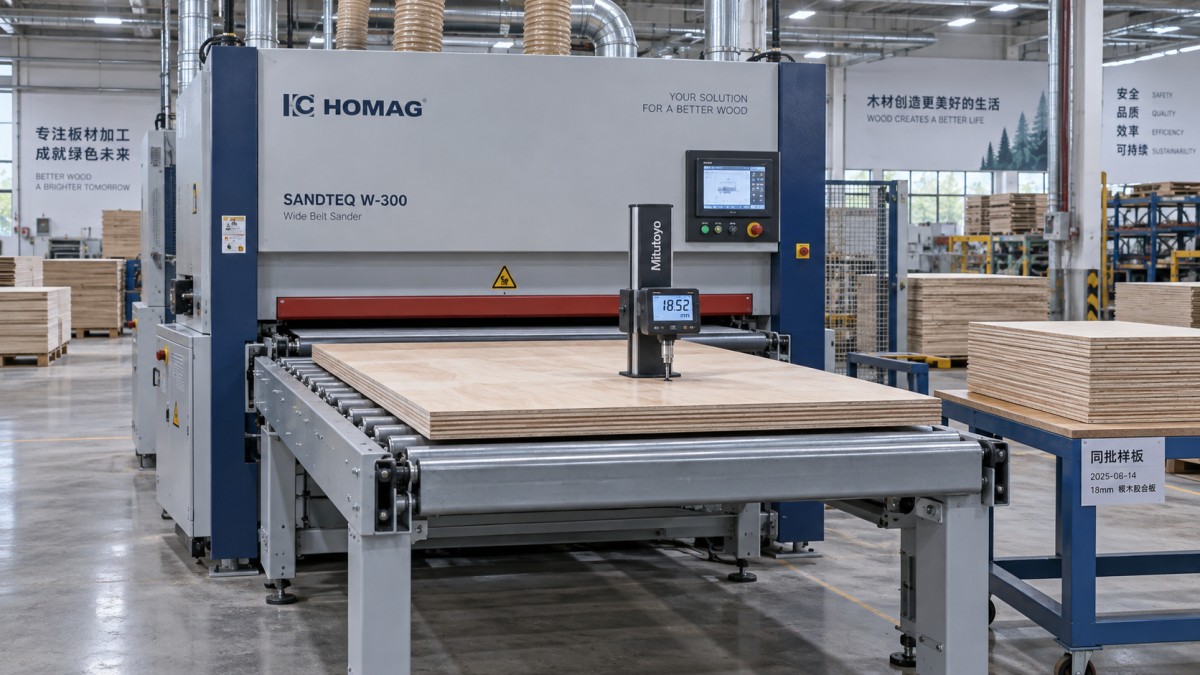
Use panels from the same batch for the initial comparison, and change only one operating variable at a time. Record belt grade, belt condition, feed speed, head settings, and dust-extraction status. Otherwise, a change attributed to calibration may actually come from a new abrasive or a different material batch.
Read the shape of the thickness error
The pattern provides a better starting point than the size of the error alone.
A controlled orientation test can help separate machine effects from panel effects. Where the machine instructions and panel dimensions permit, rotate a marked test panel 180 degrees in its plane, keeping the same face upward. Compare removal in machine coordinates, not just final thickness. Excess removal that remains on the machine’s left points toward the machine; an anomaly that follows the marked panel location points toward the material. Use matched samples where repeated passes would remove too much veneer.
Check the reference geometry before adjusting pressure
On a wide-belt plywood sander, thickness control depends on the relationship between the sanding element and the supported conveyor surface. A correct display setting does not prove that the working gap is equal across the machine.
Before inspecting internal components, isolate electrical and pneumatic energy according to the machine’s lockout procedure. Block movable assemblies where required. Running checks should use approved procedures with guards in place; never reach toward a moving belt or feed test pieces by hand into exposed contact points.
Head-to-conveyor parallelism
A sanding head that is not parallel to the conveyor reference can create a consistent cross-width taper. The fault may involve the head adjustment, table lifting mechanism, conveyor bed, or uneven wear rather than the abrasive itself.
Check parallelism using the manufacturer’s specified reference points, gauges, and setup procedure. Do not adjust from the floor, outer covers, or another surface that is not a machine datum. A spirit level alone cannot establish the working relationship between the head and conveyor.
Also check whether the table rises and lowers evenly. Lost motion in a lifting mechanism or an adjustment that does not lock securely can produce settings that appear correct at rest but change under load. Mechanical alignment should be corrected before electronic thickness offsets are used.
Conveyor condition and panel support
Resin, compacted dust, or embedded debris on the conveyor can lift a local area of the panel toward the abrasive. Uneven conveyor wear or damaged supporting components can change how the panel sits under sanding pressure.
Inspect the conveyor surface, tracking, tension, and supporting bed according to the machine design. Cleaning must use a method compatible with the belt material; an unsuitable solvent can damage the surface or alter grip.
Entry and exit supports also matter, particularly for large or flexible panels. A support set too high can tilt a panel as it enters or leaves. One set too low can allow the overhanging panel to pull downward. Both conditions can change contact at the sanding head and cause end defects.
Separate abrasive problems from head-setting problems
A belt that still produces an acceptable finish may no longer remove material uniformly. Loading, glazing, uneven wear, damaged backing, or an unsuitable splice can change cutting behavior across the working width.
With the machine safely isolated, inspect the full belt width. Look for loaded tracks, polished areas, damaged edges, and differences corresponding to the thickness map. Check tracking and oscillation against the machine specification. Restricted oscillation can concentrate wear and leave persistent tracks.
A replacement belt can be a useful diagnostic check, provided its dimensions, backing, joint, and grit suit the application. Record the change and repeat the same measurement pattern. If uneven removal disappears without a geometry adjustment, the abrasive was a significant contributor.
Check the contact element as well. Roller wear, surface damage, or deterioration can change local contact. On a platen head, inspect the specified wear components and pressure arrangement. Use the manufacturer’s service criteria rather than attempting improvised dressing or alignment.
A finishing platen is not equivalent to a calibrating head. A compliant platen can improve surface consistency while following panel contours. A suitable calibrating contact roller provides a more definite cutting reference, but its effectiveness still depends on machine rigidity, support, removal allowance, and plywood condition. Raising platen pressure does not turn a finishing operation into precise thickness calibration.
Investigate hold-down pressure and feed stability
The panel must remain supported and move steadily through the sanding zone. Excessive hold-down pressure can compress plywood locally; insufficient pressure can allow lifting, vibration, or slip. Either condition can change removal even when the unloaded machine gap is correct.
Leading- and trailing-edge thinning, often called snipe, deserves particular attention here. As a panel enters or leaves the hold-down arrangement, the forces acting on it change. Incorrect pressure-element height, worn components, poor external support, or panel bow can let an end move toward the abrasive.
Inspect pressure rollers or shoes for free movement, contamination, damage, and consistent setting. On machines with pneumatic pressure control, check the specified operating pressure and whether the supply remains stable during production. Do not use a universal pressure value: the correct setting depends on the head arrangement, panel construction, and machine design.
Feed instability can also produce uneven cutting. Check for conveyor slip, hesitation, or a speed mismatch between connected handling equipment. Slower feed increases abrasive exposure, but it is not automatically the solution. If the belt is loaded or the removal demand is excessive, slowing down can increase heat and veneer damage.
Recognize what the incoming plywood will not allow you to correct
Plywood is not a uniform solid block. Differences in veneer thickness, core construction, glue lines, moisture condition, and local bonding affect its response to sanding and pressure.
A bowed panel may be pressed flatter inside the machine and spring back after leaving. The resulting panel can look uneven even when thickness measurements show limited variation. Conversely, a weak or unsupported core area can compress during sanding and rebound afterward, complicating the relationship between the set gap and final thickness.
Check whether abnormal areas coincide with visible repairs, blisters, suspected voids, or unusual surface movement. Compare affected panels with sound panels from the same batch. If core integrity is in doubt, further sanding is not a dependable remedy.
Allow hot or differently conditioned material to stabilize before making final comparisons. Measure panels under consistent conditions rather than comparing an incoming stack in one condition with freshly processed panels in another.
The face veneer sets a practical limit on correction. If reaching target thickness would require removing more material than the face can safely lose, the panel is not suitable for that sanding target. Additional passes cannot restore material already missing from a thin area. Repeatedly feeding the whole batch until its thickest points meet target can sacrifice otherwise acceptable panels.
Confirm the correction before releasing production
After correcting an identified fault, run a controlled trial rather than immediately processing the full batch. Start with a conservative removal setting appropriate to the machine and the available veneer allowance.
- Measure several panels before and after sanding at the same marked locations.
- Compare average thickness, cross-width variation, end variation, and local removal separately.
- Inspect face-veneer condition as well as dimensional results.
- Repeat measurements after the machine reaches a stable operating condition.
- Confirm performance at the intended production feed speed and panel spacing.
Acceptance should be based on the actual product requirement and a defined measurement method, not a generic tolerance borrowed from another application. A single acceptable panel does not establish a stable process.
If uneven removal persists with a suitable abrasive, verified support geometry, and consistent test material, stop compensating through pressure or repeated passes. Service inspection should then focus on loaded head movement, roller condition, table-lifting components, bearings, and control feedback where fitted. Provide the service team with the before-and-after thickness maps and operating settings: a defect tied to a machine position is far more actionable than a report that the panels are simply “coming out uneven.”
Send Your Inquiry
We welcome your cooperation and we will develop with you.