


News & Exhibitions
Latest Factory Updates, Industry Trends & Global Exhibition Information
When does wood product sanding machinery cause uneven finishes?
Uneven finishing usually begins before a panel reaches the last sanding head. Wood product sanding machinery produces inconsistent results when the abrasive, machine settings, workpiece condition, and material flow do not match each other. The visible symptom may be a patchy sheen, cross-grain scratches, darker areas after staining, edge burnishing, or a surface that feels smooth in one direction and rough in another.
For an operator, the practical question is not simply whether the machine is “working.” A sander can continue removing material while producing a finish that will fail at the coating, assembly, or inspection stage. The fastest way to solve the issue is to identify whether the variation follows the board, the machine width, a particular shift, or a recent change in abrasive or material supply.
Start by reading the pattern on the workpiece
The location and shape of the defect often point to its source. Random rough areas across different boards suggest inconsistent wood properties, moisture, or loading practices. Repeating marks at the same position on every panel usually indicate a machine-related cause, such as a damaged belt, contaminated roller, worn brush, or pressure-setting problem.
Long, straight lines in the feed direction are commonly associated with abrasive contamination, a damaged belt joint, a scored platen, or trapped dust. Cross-grain scratches often appear when a coarse previous-sanding scratch was not removed by the next grit, or when the board is fed in an unsuitable direction for the grain and product design. Gloss differences after finishing may be less visible before coating, but they often reveal uneven surface compression caused by excessive pressure or an over-aggressive final sanding step.
Do not judge a panel only by touch. A heavily compressed area can feel smooth but absorb stain or sealer differently from the surrounding surface. Inspect with low-angle light, compare panels before and after coating where possible, and mark the feed direction on suspect pieces. These simple checks prevent operators from treating a material-removal issue as a coating issue.
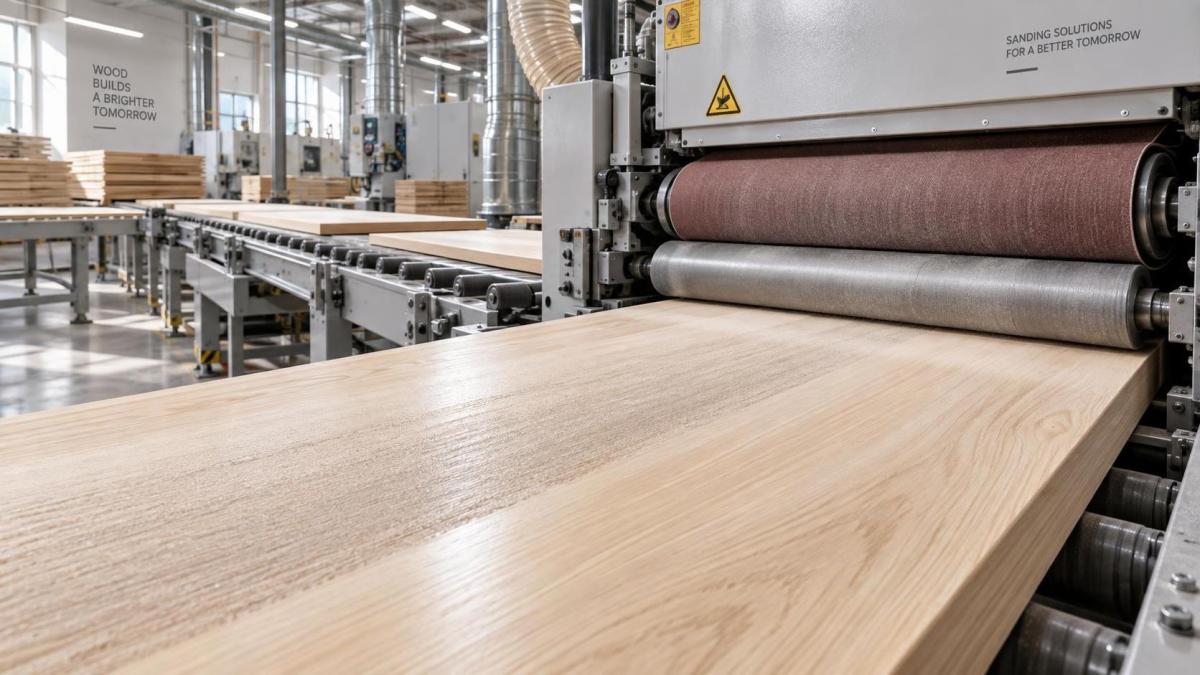
Abrasive selection and condition cause many avoidable defects
Using the wrong abrasive sequence is one of the most common reasons for an uneven finish. A finer final grit cannot reliably remove deep scratches left by an overly coarse first pass if the intermediate stages are skipped or run too quickly. Operators sometimes respond to visible scratches by slowing the line or increasing pressure. That can make the panel appear better temporarily, while creating heat, loading the belt, and deepening variations in the surface.
Each grit should have a clear job: flattening, scratch refinement, or final surface preparation. The required sequence depends on the substrate, veneer thickness, solid-wood grain, coating system, and desired appearance. MDF can tolerate a different approach from oak, ash, pine, or a thin decorative veneer. A sequence that works on a painted MDF door may leave unacceptable scratch visibility on stained solid wood.
Worn abrasives do not always look completely spent. Their cutting rate may decline unevenly across the belt width, particularly where most panels normally travel. The operator then compensates by adding pressure or reducing feed speed, which can create a polished strip in the center of the panel and rougher edges. Loading from resinous wood, glue squeeze-out, filler, or dust has a similar effect: the abrasive stops cutting cleanly and begins rubbing.
- Replace abrasives when cutting consistency drops, not only when a belt visibly tears or breaks.
- Keep abrasive grit, backing type, and installation direction consistent with the approved process.
- Investigate any sudden defect immediately after a belt or brush change; incorrect tracking and poor installation can mimic a calibration fault.
- Remove glue lines, raised filler, and contamination before the finishing stage whenever the process allows.
There is also a misconception that a finer grit always improves the finish. Beyond the point required by the coating or finishing process, very fine sanding can close the wood surface or burnish softer fibers. Stain, oil, and some sealers may then penetrate unevenly. The target is a controlled, repeatable scratch pattern, not the smoothest possible untreated surface.
Pressure, calibration, and belt tracking matter more than a single setting
Uneven contact pressure is especially damaging because it produces different results across one panel. A machine may remove too much material on one side, leave mill marks in another area, or create recurring bands. Common causes include misaligned heads, an uneven platen, poorly adjusted segmented pressure elements, roller wear, incorrect conveyor height, and an unlevel machine base.
Calibration should be checked with representative material, not only by observing an empty conveyor. A lightweight, narrow panel and a wide, heavy panel do not behave in the same way under a contact drum or sanding belt. Warped stock can lift locally during feed, while thin material may flex and receive more sanding near support gaps. If production includes a broad range of thicknesses, operators need a controlled setup procedure whenever thickness changes rather than relying on a previous setting.
Conveyor condition deserves equal attention. A worn belt, damaged vacuum section, weak hold-down, or accumulated dust can allow the workpiece to shift during sanding. Even minor movement may create diagonal marks or inconsistent edge treatment. When a defect appears only on small parts, examine workpiece stability before altering the sanding head. Increasing pressure on an unstable part usually makes the outcome less predictable.
For brush finishing, the same principle applies in a different form. Brush contact that is too light may leave inconsistent texture; contact that is too heavy can round edges, exaggerate softwood pores, or create a directional appearance that changes under light. A machine with independently arranged discs, vertical rollers, and straight rollers can give operators more control over profiles and panel faces, but only if brush height, oscillation, feed speed, and abrasive media are set for the actual material.
For example, a Brush Polishing Machine configured with disc and roller brush groups may be relevant where furniture components need a controlled brushed or polished finish across panel faces and edges. Its stated 5-140 mm working-thickness range and adjustable 5-30 m/min feed range illustrate why setup cannot be reduced to one universal recipe: a thin MDF panel at a higher feed rate will not respond like a thick solid-wood component requiring more texture definition.
Wood movement and panel preparation can defeat a correct machine setup
When machine checks show no clear fault, look closely at the material. Wood does not sand uniformly when its moisture content varies within a batch or when boards have not stabilized in the production environment. Harder and softer grain sections remove at different rates. Raised grain, loose knots, end grain, mineral streaks, and differences between face veneer and core can all change the visual result.
Moisture-related variation is often mistaken for a sanding defect because the panel may look acceptable immediately after machining. Later, fibers can rise, joints can telegraph through the face, or stain can reveal localized absorption differences. Sanding cannot correct a board that is moving or a veneer surface already distorted by unstable substrate conditions. It may only make the defect more visible.
Panel quality upstream matters as well. Thickness variation, poor glue-line preparation, untrimmed edge banding, and inadequate initial machining force the final sanding stage to perform corrective work that it was not designed to do. A finishing sander should refine a reasonably consistent surface. If it is used to flatten serious defects, abrasive consumption rises and finish consistency falls.
For solid wood, watch grain orientation and component mix. Running pieces with sharply different species, widths, or grain patterns through one fixed program can produce a technically acceptable average result but a visibly inconsistent batch. Grouping similar materials and using verified recipes is often more effective than continually adjusting settings during the run.
Feed speed and removal rate must be treated as a pair
Operators often change feed speed first because it is accessible and immediately affects the surface. It should not be adjusted in isolation. A slower feed increases abrasive contact time and material removal. If pressure, belt condition, and grit remain unchanged, slowing the feed can create edge rounding, heat marks, or over-sanded soft grain. Raising the feed too far can leave previous scratches intact and make the finish look inconsistent from panel to panel.
The correct setting is the one that removes the intended amount consistently without overheating, clogging, or compressing the surface. A small trial run is more useful than a broad setting change. Run several pieces from the same material lot, inspect them under the same lighting, and compare the first and last pieces. A result that looks good on one board but drifts across a batch is not a stable process.
Track changes in a setup record: panel type, thickness, abrasive sequence, head settings, feed speed, and observed result. This is particularly valuable for wood product sanding machinery that handles frequent product changes. It reduces dependence on individual operator memory and makes it easier to identify whether a problem began after a material, tooling, or parameter change.
Separate sanding defects from coating defects before making corrections
Some finish complaints originate after sanding. Uneven stain color can result from wood density variation, glue contamination, uneven sealer application, or incompatible finishing materials. However, sanding may still be involved when it creates localized burnishing, residual scratches, or inconsistent surface openness.
A practical check is to inspect the bare board at several stages. If a defect is visible before coating under angled light, sanding or upstream panel preparation is the likely place to investigate. If the raw panel is uniform but the defect appears only after stain, sealer, or topcoat, review the finishing process as well. Avoid repeatedly sanding coated-reject panels without identifying the original cause; this can remove veneer, alter profiles, and conceal useful evidence.
For stained or clear-coated products, keep a retained approved sample near the line. It gives operators a realistic reference for scratch direction, pore definition, edge softness, and sheen. Written settings are necessary, but a physical sample helps distinguish a normal material characteristic from a developing process fault.
A useful troubleshooting order on the shop floor
When uneven finishes appear, begin with the smallest number of variables. Confirm that the defect repeats, identify its location relative to machine travel, and isolate one material type. Then inspect abrasives and brushes, clean contact surfaces, verify tracking and conveyor condition, and check head or pressure calibration. Only after those checks should feed speed or pressure be changed.
If the defect follows the machine width, focus on the sanding head, platen, roller, brush, or conveyor support at that position. If it follows certain boards regardless of where they run, inspect moisture, flatness, grain, veneer quality, and upstream preparation. If the defect begins after a tooling change, return to the approved abrasive or brush specification before making wider mechanical adjustments.
A stable finish comes from controlling removal rather than chasing appearance panel by panel. Once abrasive condition, contact pressure, material quality, and feed rate are aligned, the machine becomes predictable. That predictability is what reduces rework, protects thin surfaces, and gives operators a defensible basis for deciding whether the next correction belongs at the sander, earlier in preparation, or in the coating line.
Send Your Inquiry
We welcome your cooperation and we will develop with you.