


News & Exhibitions
Latest Factory Updates, Industry Trends & Global Exhibition Information
What causes glue line defects on an edgebander and how to prevent them
What Causes Glue Line Defects on an Edgebander and How to Prevent Them
A visible glue line is one of the fastest ways to make an otherwise well-machined panel look unfinished. It may appear as a dark seam between the edge band and board, a pale line on light panels, a gap at the corner, or glue squeeze-out that remains visible after trimming. More seriously, some panels look acceptable when they leave the Edgebander but develop edge lifting after storage, transport, or changes in temperature.
These issues are rarely caused by one setting alone. In practical production, glue line defects usually come from an interaction between panel preparation, edge band material, adhesive condition, machine adjustment, and workshop environment. An operator who only turns up the glue temperature or increases pressure may hide the symptom for a short time while creating another problem further down the line.
The most reliable approach is to distinguish between two different faults: a visible glue line, where bonding may still be structurally sound but the finish is poor, and a bonding failure, where the edge band does not achieve adequate adhesion. The correction depends on which one is actually happening.
Start by identifying what the defect is telling you
A straight, consistent line along the whole panel often points to board edge quality, adhesive colour, or insufficient edge-band coverage. A defect that appears only at the leading or trailing end is more likely related to pressure roller timing, panel support, trimming, or changes in feed stability. Random open sections usually deserve closer attention because they may indicate dust, uneven substrate density, contaminated adhesive, or a mechanical alignment issue.
Poor panel-edge preparation is a common root cause
The glue station cannot compensate for a damaged board edge. Chipboard, MDF, plywood, and laminated boards each react differently during cutting. A saw blade that is dull, incorrectly aligned, or poorly supported can leave micro-chipping, torn fibres, a slightly hollow edge, or exposed particles. When the edge band is pressed against that surface, adhesive must bridge irregularities instead of forming a controlled bonding layer.
This is why pre-milling matters on an Edgebander. Properly adjusted pre-milling cutters remove saw marks and create a fresh, square surface for bonding. But pre-milling is not automatically beneficial if the cutters are worn or the units are set incorrectly. Worn cutters can polish, burn, or tear the substrate. An unevenly machined edge may look smooth at a glance yet still create a visible seam under direct lighting.
Before changing adhesive settings, stop the line and examine several unglued panels. Look along the edge with raking light. Feel for steps, pits, and loose particles. If one face of the board is consistently worse than the other, check panel orientation, pressure beam adjustment, chain pads, and the relationship between the pre-milling unit and the workpiece guide.
Dust is equally disruptive. Fine sanding dust, loose chips, oil residue, and even moisture can prevent adhesive from wetting the surface evenly. Vacuum extraction around the pre-milling and glue area should be treated as part of bond quality control, not merely housekeeping.
Adhesive temperature matters, but “hotter” is not the answer
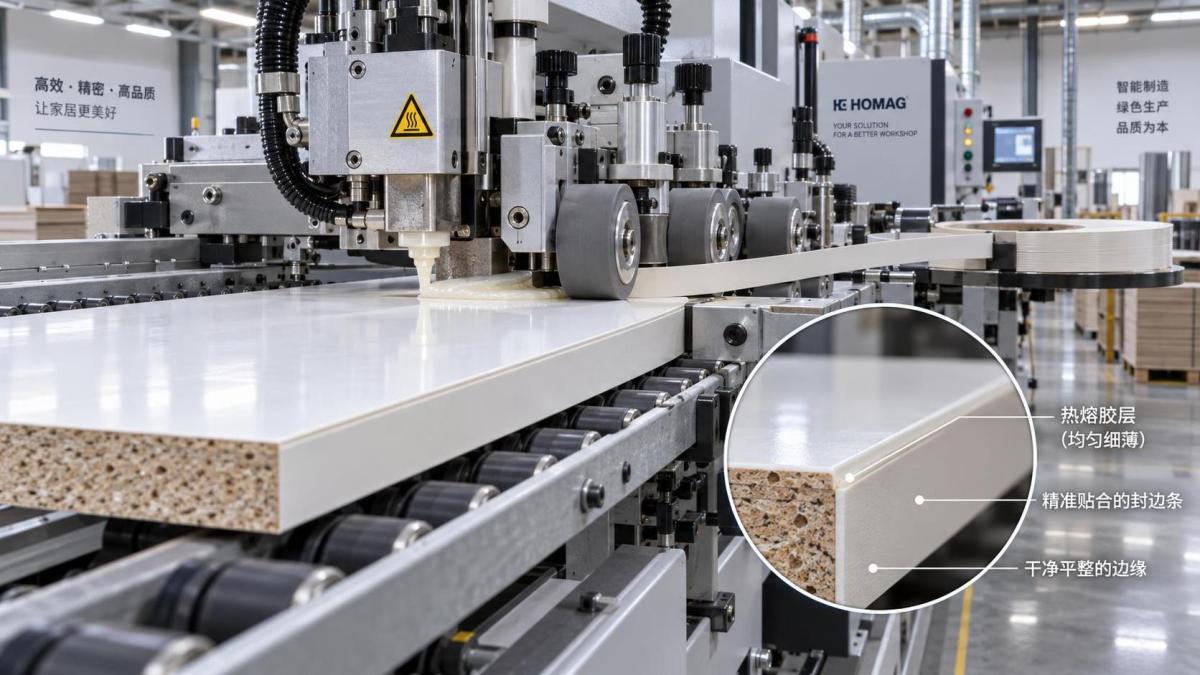
Hot-melt adhesive needs to reach the working temperature recommended by its supplier before it can flow and wet both the panel edge and edge band properly. If it is too cool, the adhesive may appear thick, stringy, or poorly distributed. It can lose heat before the pressure rollers close the joint, leaving insufficient bonding strength.
Overheating creates a different set of risks. Many hot melts degrade when held at excessive temperature for too long. The adhesive may darken, develop burnt particles, become unstable in viscosity, or leave discoloration that is especially obvious with white, light grey, or high-gloss materials. Operators sometimes respond to a weak bond by raising the setpoint repeatedly. If the glue pot is dirty, the roller is poorly adjusted, or the panel is cold, that response can make the finish worse.
The displayed temperature on the machine is a reference point, not proof of the adhesive temperature at the application roller. Heating performance, sensor location, adhesive level, and accumulated residue all affect the real condition of the melt. Follow the adhesive manufacturer’s technical guidance for melting and holding temperatures, then verify that the glue is flowing uniformly across the working width.
Adhesive selection also has to match the application. EVA hot melt remains common for many routine furniture applications, while PUR adhesive is often considered where higher resistance to heat, moisture, or demanding service conditions is needed. They are not interchangeable through casual adjustment. PUR processing requires appropriate equipment practices and careful handling because cured residue is difficult to remove and moisture exposure affects the material. The adhesive supplier’s instructions and the machine configuration should guide this decision.
Glue quantity and roller condition determine whether the joint can close cleanly
Too little adhesive leaves dry sections and weak spots. Too much creates squeeze-out, visible beads, contamination of trimming tools, and a line that may remain noticeable even after scraping. The ideal film is not necessarily the thickest one. It should provide continuous coverage without leaving excess material at the edge of the joint.
A practical inspection is to pause production after a short test run and look at the glue pattern before the panel reaches the finishing units. The coating should be continuous rather than striped or patchy. If coverage changes from one side of the panel to the other, inspect the glue roller, doctor roller, glue pot level, and the setup for the actual panel thickness.
Glue rollers gradually accumulate hardened adhesive and fine dust. A roller that no longer runs true can apply a changing film thickness even when the settings appear unchanged. Cleaning must be done according to the machine and adhesive guidance. Aggressive scraping or unsuitable cleaning methods can damage the roller surface and create a persistent application problem.
Pressure rollers must close the joint, not crush it
The pressure zone is where the edge band is pushed into the adhesive before the glue loses workable heat. Roller pressure, angle, and alignment must match the panel and edging material. Insufficient pressure leaves a gap; excessive pressure can force out too much glue and may distort softer edge band materials. On thin edging, the result can be a joint that looks clean initially but lacks a stable adhesive layer.
Do not judge roller adjustment by one panel only. Run several pieces and inspect both the beginning and end of each edge. If the middle bonds well but the ends do not, check whether the workpiece is entering squarely, whether the pressure rollers engage consistently, and whether the conveyor feed is stable. A slight variation in panel thickness can also change the effective pressure. This is particularly relevant when boards from different batches are mixed without checking their actual thickness.
Rollers should turn freely and have clean, undamaged surfaces. Adhesive deposits on a roller can pull the edge band, mark the surface, or create uneven contact. It is a small maintenance point with a large visual consequence.
Feed speed, cold materials, and short open time can work against each other
Every adhesive has a limited open time: the period in which it remains capable of forming a proper bond after application. If feed speed is too high for the adhesive condition, or if the distance from glue application to pressure contact is not effectively managed, the glue can begin to set before the edge band is fully pressed home.
Cold boards and cold edge banding make this more likely. In winter, panels stored near loading doors or in unheated areas can draw heat from hot melt surprisingly quickly. The operator may see intermittent weak bonding even though the machine settings have not changed. Bringing materials into the production environment early enough to stabilize is often more effective than chasing the fault through repeated temperature adjustments.
Very high feed speed is not inherently wrong; it simply narrows the process window. If quality drops after a speed increase, reduce speed temporarily and compare the result. A clean improvement points toward heat transfer, glue application, or pressure timing rather than a trimming defect.
Not every visible line comes from the glue station
Finishing units can make a sound joint look defective. Incorrect flush trimming may leave the edge band slightly proud or slightly recessed, creating a shadow line. Scraper settings that are too aggressive can cut into the edge band or disturb the adhesive boundary. Buffing wheels may reveal residue rather than remove it if earlier trimming has not been set correctly.
Edge band colour and transparency also influence perception. A translucent or thin edge band may show the adhesive beneath it more readily than an opaque material. Dark adhesive against a light décor is unforgiving, while a colour-matched glue may reduce visual contrast. That does not replace correct bonding, but it can be an important finishing decision for premium cabinet doors, visible shelving, and panels used under strong showroom lighting.
A sensible troubleshooting routine prevents wasted panels
When defects appear, change one variable at a time. Altering glue temperature, feed speed, roller pressure, and trimming settings together may produce a good panel by accident, but it gives no reliable process setting for the next shift.
A useful sequence is to inspect the raw panel edge, confirm the edge band and adhesive are suitable for the job, check adhesive condition and coverage, then assess pressure roller contact. Only after the bond itself appears sound should the operator focus on trimming, scraping, and buffing. Keep a sample panel from before and after each adjustment. In day-to-day production, that simple habit makes recurring faults much easier to recognize.
For workshops running varied panel materials, a short setup record is worth maintaining: board type, edging type, adhesive used, observed material condition, feed setting, and any adjustment made. It does not need to be complicated. Its value is that the next operator does not have to rediscover the same solution when a familiar material returns.
Reliable glue lines come from a stable process
A good Edgebander does not remove the need for disciplined setup and maintenance. It gives the operator a repeatable platform: accurate panel guiding, stable glue application, dependable pressure contact, and finishing units that can hold adjustment. Qingdao Zhongding Machinery Co., Ltd., drawing on more than 20 years in woodworking machinery manufacturing and export, supports users across furniture plants, woodworking workshops, and industrial production lines with this practical view in mind: machine performance and operating practice have to work together.
If a glue line defect keeps returning, resist the temptation to treat it as a cosmetic nuisance. Inspect the panel edge, adhesive, rollers, material temperature, and finishing sequence in that order. The panel usually gives enough clues to find the real cause—and correcting that cause is far less expensive than trimming, reworking, or replacing finished parts later.
Send Your Inquiry
We welcome your cooperation and we will develop with you.