


News & Exhibitions
Latest Factory Updates, Industry Trends & Global Exhibition Information
Why does a metal sanding machine belt clog when sanding aluminum?
A metal sanding machine belt clogs when aluminum chips stick to the abrasive grains and pack into the spaces between them. Aluminum is relatively soft and ductile, so it can smear across the belt instead of leaving the contact area as separate chips. An unsuitable abrasive, excessive grinding pressure, prolonged contact, and poor chip removal can accelerate this process.
Once deposits cover the cutting edges, the belt rubs more and cuts less. Friction and temperature rise, encouraging further adhesion. Replacing the belt interrupts this cycle, but loading will return unless the operating conditions change. The useful starting point is to examine how the belt is loading, where the deposits appear, and when cutting performance begins to fall.
Check whether the belt is loaded, glazed, or damaged
With the machine stopped and isolated from its energy sources, inspect the abrasive surface under good lighting. Aluminum loading usually appears as silver patches, flattened metallic smears, or compacted material between the grains. Raised deposits may produce deep scratches because the accumulated metal drags across the workpiece.
Glazing is different: the abrasive cutting edges have become dull or flattened. A glazed belt may look polished without carrying much visible aluminum. Loading and glazing can occur together, but cleaning a belt will not restore worn cutting edges.
Also inspect the backing, splice, and belt edges. A belt with torn backing, a lifting joint, or heat damage needs replacement. Treating every loss of cutting performance as removable clogging can leave a damaged abrasive in service.
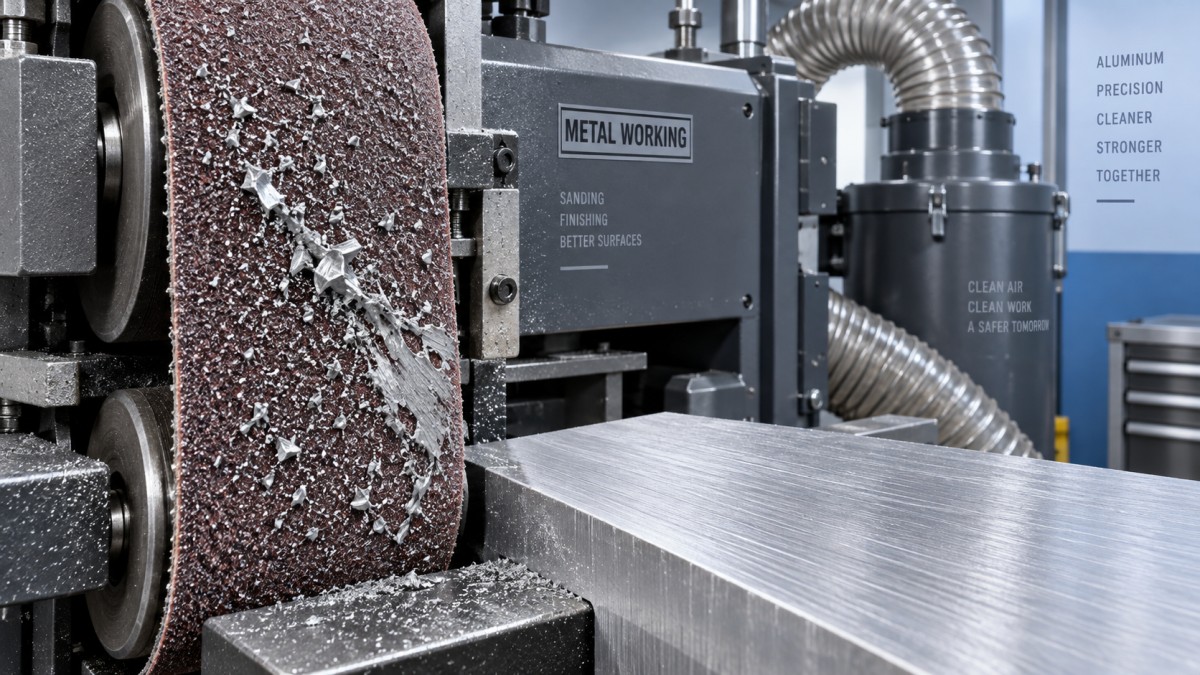
These patterns guide the investigation; they do not establish a cause by themselves. For example, a loaded strip may follow the normal workpiece path even when tracking is correct. Compare the deposit pattern with where material actually contacts the belt.
Choose the belt for aluminum, not just for its dimensions
A belt can fit a machine correctly and still be poorly suited to aluminum. The specification needs to match the material, stock removal, finish requirement, contact arrangement, and operating pressure.
Grain spacing matters because chips need room to leave the cutting area. A more open abrasive coat can provide additional clearance and reduce packing. A dense coating may load quickly during demanding aluminum removal, particularly when combined with fine grit. However, the most open coating is not automatically the right choice for every finishing operation; scratch consistency and contact support still matter.
Check whether the belt has a manufacturer-approved anti-loading treatment for aluminum. Some treatments reduce adhesion, but their suitability also depends on the next process. Residues that are acceptable before further machining may be undesirable before painting, bonding, or anodizing.
Do not select an abrasive solely because its mineral is described as hard or durable. Aluminum oxide, silicon carbide, zirconia alumina, and ceramic abrasives are available in different constructions. Their performance depends on grain design, coating, backing, and the conditions needed to maintain effective cutting. A belt intended for heavy steel grinding may perform poorly on a lightly loaded aluminum finishing operation.
Grit selection deserves the same attention. Starting with a very fine belt to remove heavy tool marks forces a finishing abrasive to carry a large chip load. Use a suitable initial removal stage, then progress toward the required finish. A coarser belt may reduce loading, but it also leaves deeper scratches that subsequent stages must remove.
Correct pressure and contact time before chasing a speed setting
When a belt starts cutting slowly, increasing pressure is a common response. On an already loaded abrasive, that usually presses the deposits harder against the part, raising friction and worsening scratches. Reduce the removal demand and inspect the belt before adding force.
Excessive pressure can smear aluminum and overload the available chip space. Insufficient pressure can also cause trouble when the selected abrasive needs greater engagement to cut effectively. The objective is stable cutting within the machine and belt supplier’s operating range, with consistent material removal and an acceptable finish.
On a wide-belt machine, check the thickness setting and removal assigned to each head. A small setup error can impose too much stock removal on one belt. On manually presented parts, examine dwell time: holding a corner or small area against the belt concentrates pressure and heat.
Inspect contact rollers, platens, pressure shoes, and workpiece support where fitted. Wear, embedded debris, or uneven adjustment can produce a localized hot spot even when the nominal pressure setting appears reasonable. A fresh belt will reproduce that loading pattern if the contact problem remains.
Belt speed should be adjusted in relation to pressure, feed, and removal demand. Excessive speed can increase heat in an unsuitable setup, while reducing speed too far can impair cutting and encourage longer contact. There is no universal aluminum sanding speed that applies to every machine and belt.
Likewise, slowing conveyor feed does not necessarily improve the result. It increases contact time and may raise workpiece temperature. Change one variable at a time within approved limits, keeping the material and removal target consistent. Evaluate both loading and finish; a clean-looking belt is not an improvement if it no longer achieves the required removal.
Check chip capture and the condition of incoming parts
Extraction helps remove loose particles before they circulate around the contact area. It cannot reliably pull aluminum off a grain once the metal has adhered firmly. Persistent loading therefore requires attention to cutting conditions as well as extraction.
Inspect pickup openings, duct restrictions, filter condition, and collection-system indicators. Follow the equipment’s specified airflow or pressure criteria where provided. A running fan or audible suction does not establish that capture at the sanding head is adequate.
Aluminum sanding also creates a combustible dust hazard. The collection system must be suitable for the actual metal dust and process. Do not route aluminum dust into an ordinary woodworking collector, mix it casually with steel grinding debris, or use a general-purpose shop vacuum for cleanup. Wet collection requires equipment designed for the application because aluminum can generate hydrogen under some wet conditions.
Surface contamination can make a suitable belt appear defective. Cutting oil, adhesive, protective-film residue, and polishing compound can bind particles into a sticky deposit. If loading began after a change in upstream processing, compare incoming parts before altering the machine.
Clean parts using a process compatible with the alloy and downstream finish, and allow them to dry before dry sanding. Different aluminum alloys and tempers can also load differently. A softer, more ductile batch may require a revised abrasive or removal strategy even when its dimensions match previous production.
Clean a loaded belt only when its condition allows it
Light surface loading may be removable with an abrasive cleaning method approved for the belt and machine. Cleaning is useful when it exposes cutting grains that still have serviceable edges. It is much less effective when aluminum is firmly smeared over dull abrasive.
On enclosed or automatic machinery, do not insert a handheld cleaning stick into a moving belt path. Use only a cleaning arrangement explicitly intended by the machine manufacturer. For inspection, removal, or manual maintenance, isolate the equipment and follow its maintenance procedure.
Replace the belt if cleaning leaves raised metallic deposits, cutting performance remains poor, or the backing and splice show damage. Repeated cleaning can consume more downtime than a replacement while allowing scratches to continue through production.
Do not spray improvised oils, waxes, or lubricants onto a dry sanding machine. They may affect belt tracking, bond integrity, dust behavior, and subsequent coating or bonding. A purpose-formulated grinding aid is an option only when the machine, abrasive, collection arrangement, and downstream process permit it.
Changing to wet sanding requires the same discipline. It needs a machine and collection system designed for wet aluminum processing, along with suitable abrasives, coolant management, and electrical protection. Adding liquid to a dry machine is not a maintenance adjustment.
Use a controlled restart to find the recurring cause
A useful trial establishes whether the process can maintain acceptable cutting after the initial benefit of a fresh belt has passed. Record the existing condition before making changes, then use a representative part and a clearly defined removal target.
- Record the baseline. Note the alloy and surface condition, belt specification, pressure or thickness setting, belt speed, feed, and loading pattern.
- Restore the machine condition. Address extraction restrictions, contaminated contact components, uneven support, and alignment issues before adjusting the process.
- Fit a suitable, serviceable belt. Use an aluminum-appropriate specification so previous loading does not distort the trial.
- Change one process variable. Adjust removal per pass, pressure, feed, or speed within the approved range, then compare equivalent workpieces.
- Inspect at a repeatable point. Compare deposit growth, material removal, scratch pattern, and workpiece temperature using the same safe assessment method.
If loading returns immediately, focus on abrasive compatibility, contamination, and excessive local contact. If it develops gradually as production warms up, examine heat accumulation and the balance between removal demand and feed. If only one strip loads, investigate contact distribution before replacing the entire abrasive specification.
Keep a labeled photograph of the belt and the resulting workpiece finish with the settings used. That record makes a later recurrence easier to diagnose and gives technical support something more useful than “the belt clogs quickly.” The successful setting is the one that maintains the required removal and finish through normal production without rapid deposit growth or repeated pressure increases.
Send Your Inquiry
We welcome your cooperation and we will develop with you.