


News & Exhibitions
Latest Factory Updates, Industry Trends & Global Exhibition Information
Preventing Misaligned Mortises on a Woodworking Door Lock Machine
A mortise that is only slightly off can prevent the lock case from seating flat, push the handle spindle out of line, or leave too little material at the door edge. The result is usually not discovered until fitting, when correction is slower and more expensive. On a Woodworking Door Lock Machine, avoiding this problem depends less on one adjustment than on controlling the complete reference chain: the door must be supported consistently, the machine must reference the correct face and edge, and the cutting unit must move without play.
When mortises are misaligned repeatedly, operators often begin by changing the program or moving the fence. That may help, but it can also hide the real cause. A practical diagnosis starts by identifying whether every mortise is wrong in the same direction, whether the error changes from door to door, or whether the pocket itself is inconsistent. Each pattern points to a different part of the setup.
Start by identifying the type of misalignment
Before adjusting anything, machine several test mortises in offcut material or rejected door blanks of the same thickness. Measure from the same reference points used during production: the lock edge, the reference face, the top or bottom end, and the centerline of the handle or cylinder position. Do not judge alignment only by placing a lock case into the pocket. A lock can appear to fit while its faceplate, spindle, or cylinder drilling is still out of position.
This separation matters. A fixed offset requires recalibration. Variable errors require better workholding or material control. Tooling-related problems can look like positioning errors, but moving a fence will not correct a cutter that is wandering under load.
Build a reliable datum before setting the machine
A door lock mortise should be located from a clearly defined reference face and edge. In most production setups, the operator chooses one face of the door as the primary datum and one lock stile edge as the secondary datum. All related operations, including the lock pocket, faceplate recess, handle drilling, and cylinder drilling, should be tied to that same logic.
A common mistake is to reference the mortise from the door center when the finished lock hardware is intended to align with a particular face. This is especially risky when door thickness varies, when veneers differ between faces, or when the door is later handed differently. Center referencing may be appropriate for hardware designed around the door thickness centerline, but it must be deliberate and consistent across every operation.
Mark the intended reference face during setup, even if the doors appear identical. A simple visual mark prevents a batch from being loaded face-up for some parts and face-down for others. In a CNC or programmed door lock machine, confirm that the active program uses the same datum as the physical stops and clamping arrangement. A correct program with the wrong loading orientation will repeat the wrong result efficiently.
Check the door blank, not only the machine
Door blanks are not always perfectly flat, parallel, or uniform. Bow, twist, edge damage, and thickness variation affect how the workpiece sits against a fence or table. If a bowed door is forced into position by clamps, it may spring back after machining or sit differently when turned over. The mortise can then be correctly positioned relative to the clamped shape but wrong relative to the finished door.
Inspect the lock stile before machining. Remove chips, glue squeeze-out, protective film fragments, and loose veneer at the contact points. A small piece of debris beneath the door or against the side fence can shift the workpiece enough to affect lock fitting. For doors with significant warp, address the blank quality first; increasing clamp pressure is not a dependable correction and may leave marks or distort the part.
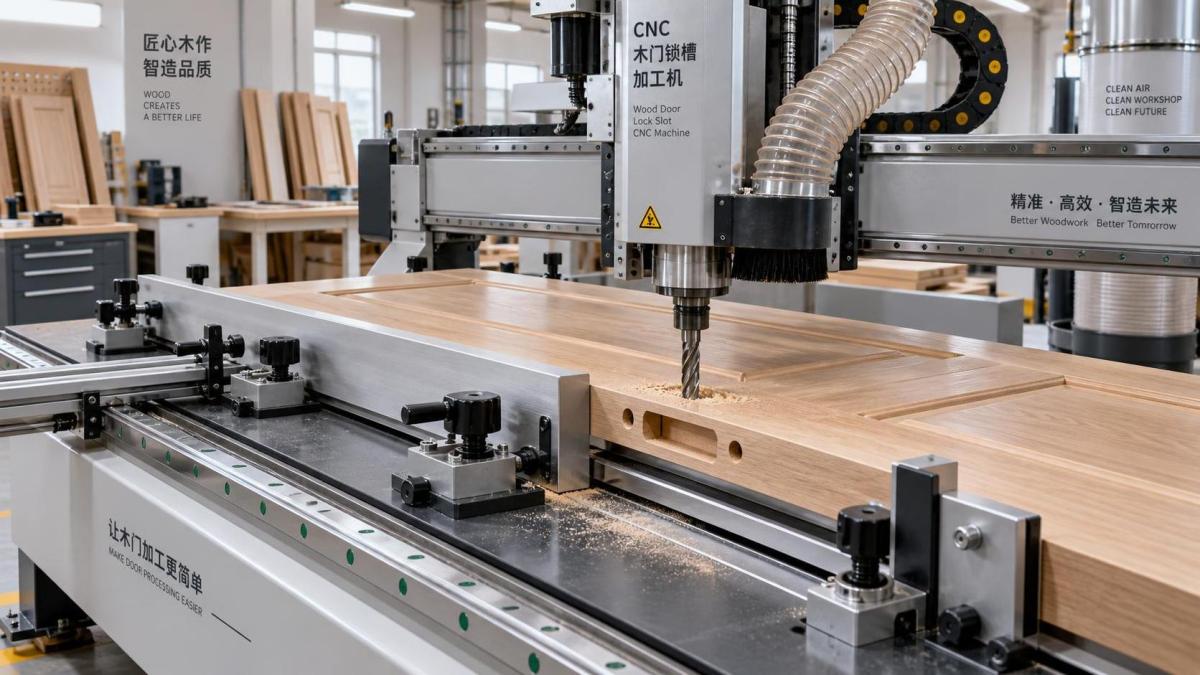
Workholding is where repeatability is won or lost
The door must be held against the locating surfaces before the clamps apply full pressure. Clamps are meant to secure a correctly positioned workpiece, not pull an incorrectly placed one into place. If a pneumatic or manual clamp draws the door sideways as it closes, every cycle may have a different offset depending on surface friction, door weight, and operator loading.
Check that the side fence is straight, firmly secured, and free from damage. Verify that end stops contact a sound, square portion of the door rather than a chipped corner or profiled area. Support points should keep a long door stable without allowing it to rock. If the table has adjustable supports, set them so they contact the workpiece without forcing a twisted door into a new shape.
For repeated production, make loading repeatable. The operator should be able to place the same face against the same reference, slide the door to a positive stop, confirm full contact, and then clamp. Avoid relying on visual alignment with a ruler mark for each door. A mark can help identify orientation, but physical stops and defined datums produce better consistency.
On machines that process different door sizes, record the stop position and support arrangement for each recurring door type. Returning to an earlier setting by memory is a frequent source of setup error. A simple setup sheet can include door thickness, reference face, lock edge, stop position, tool specification, clamping location, and the first-piece inspection points.
Set the cutter for the pocket, not just the nominal lock size
Mortise accuracy is affected by the relationship between the cutter and the lock case. A worn or undersized cutter may leave excessive material that encourages the operator to force the lock body into the pocket. An oversized cutter can create side clearance that makes a positioning error harder to notice until the faceplate is fitted.
Use a cutter appropriate for the intended pocket geometry and confirm that it is securely installed. Check the shank, collet, and tool holder for resin buildup, wear, or damage. A cutter that is not seated properly can run out, producing an irregular pocket even when the machine axes are correctly positioned. If the tool produces a clean dimension at a shallow depth but a wider or shifted cut at full depth, deflection or spindle condition deserves attention.
Feed rate also matters. Pushing too aggressively through dense timber, engineered cores, hardwood edging, or glue lines can deflect the cutter. The resulting pocket may be wider on one side, rounded at the ends, or visibly pulled from its intended path. Reducing the cutting load, using a sharp tool, and taking suitable passes are better responses than compensating the program for a deflection pattern.
Do not assume that a new cutter automatically improves accuracy. Confirm its actual diameter and cutting length against the machining requirement. Tool substitutions should be treated as setup changes, particularly when a program has previously been adjusted around a specific cutter.
Calibrate the sequence around the lock hardware
The mortise is only one element of the lock preparation. The lock faceplate, handle spindle, key cylinder, escutcheon, and strike relationship must agree. A door can have a centered mortise but still fail at assembly because the pocket does not match the drilling pattern or faceplate recess.
The most useful first-piece check is an assembly check with the actual hardware intended for the job. Place the lock case in the mortise without forcing it. Confirm that it sits to the required depth, the faceplate area can be finished cleanly, and the relevant drilling aligns with the lock body. Then check from both faces of the door. This catches a reversed reference face or incorrect centerline before a full batch is machined.
When the hardware model changes, do not reuse an existing setting based only on similar overall dimensions. Lock cases can differ in backset, case depth, faceplate size, spindle height, cylinder relationship, and fixing-hole locations. Treat a hardware change as a new machining setup. Store verified settings by hardware model and door construction, not by a vague label such as “standard lock.”
Use one adjustment at a time
When a test piece fails, adjust one variable, produce another test, and record the result. Changing the stop, fence, program offset, depth setting, and tool at once makes it impossible to know what corrected the problem. This is particularly important on a Woodworking Door Lock Machine with multiple axes or combined drilling and mortising functions, where one visible error can have more than one source.
If every lock is offset by the same measured distance, correct the relevant coordinate or physical datum and verify it with another sample. If the error changes between samples, do not compensate with a coordinate offset. Investigate clamping, door support, loose fixtures, and operator loading first.
Mechanical checks that should not wait for a breakdown
Repeated alignment problems may indicate wear rather than an incorrect setup. Examine fences, stops, clamp pads, guide mechanisms, spindle mounts, and moving assemblies for looseness. Check whether a stop can be moved by hand after tightening, whether clamp pads are unevenly worn, and whether the carriage has noticeable play when changing direction.
Backlash can be especially misleading. The machine may position accurately when approaching from one direction and miss when approaching from the other. Where the control system permits, use a consistent approach direction for the final positioning movement. If the machine cannot repeat the same coordinate under normal operation, mechanical service is more appropriate than repeated software compensation.
Dust extraction also supports accuracy. Chips trapped against a fence, under a door, or inside a locating area change the workpiece position. Keep the table, stops, and clamping zones clean between pieces, not only at the end of a shift. Resin accumulation on contact surfaces can create the same problem more gradually.
A practical first-piece routine
Before committing production material, use a short routine that checks the full reference chain:
- Confirm the hardware model, door handing, reference face, and lock edge.
- Inspect the door blank for warp, damaged edges, debris, and unstable contact points.
- Verify that the correct cutter is installed, clean, sharp, and fully secured.
- Set the door against the fence and stop, then confirm contact before clamping.
- Machine a test piece using the same loading method planned for production.
- Measure the mortise from the designated edges and test-fit the lock case.
- Check related drilling and faceplate positioning before releasing the setup.
- Keep the verified sample or recorded dimensions available for in-process comparison.
This routine is more valuable than a final inspection alone because it prevents a setup error from being repeated across an entire run. During production, recheck after a tool change, an adjustment to stops or clamps, a material thickness change, or an unexpected machine interruption.
When the issue is not an operator adjustment
Some problems cannot be solved reliably at the control panel. Persistent axis play, unstable spindle behavior, damaged locating surfaces, unreliable pneumatic clamping, or a machine structure that no longer holds calibration require inspection and service. Continuing to compensate around a mechanical fault tends to create a setup that works only under one set of conditions.
When selecting support for a door lock mortising operation, access to setup guidance, spare parts, and responsive technical assistance is practical rather than incidental. Qingdao Zhongding Machinery Co., Ltd. supplies woodworking machinery and supports customers with technical service and parts availability, which can be relevant when a recurring alignment problem points beyond routine operator setup.
Accurate mortising comes from treating the door, fixture, cutter, program, and lock hardware as one connected system. Once the reference face is fixed, the workpiece is held consistently, and the tool path is verified with the actual lock, misaligned mortises become easier to diagnose and far less likely to interrupt production.
Send Your Inquiry
We welcome your cooperation and we will develop with you.