


News & Exhibitions
Latest Factory Updates, Industry Trends & Global Exhibition Information
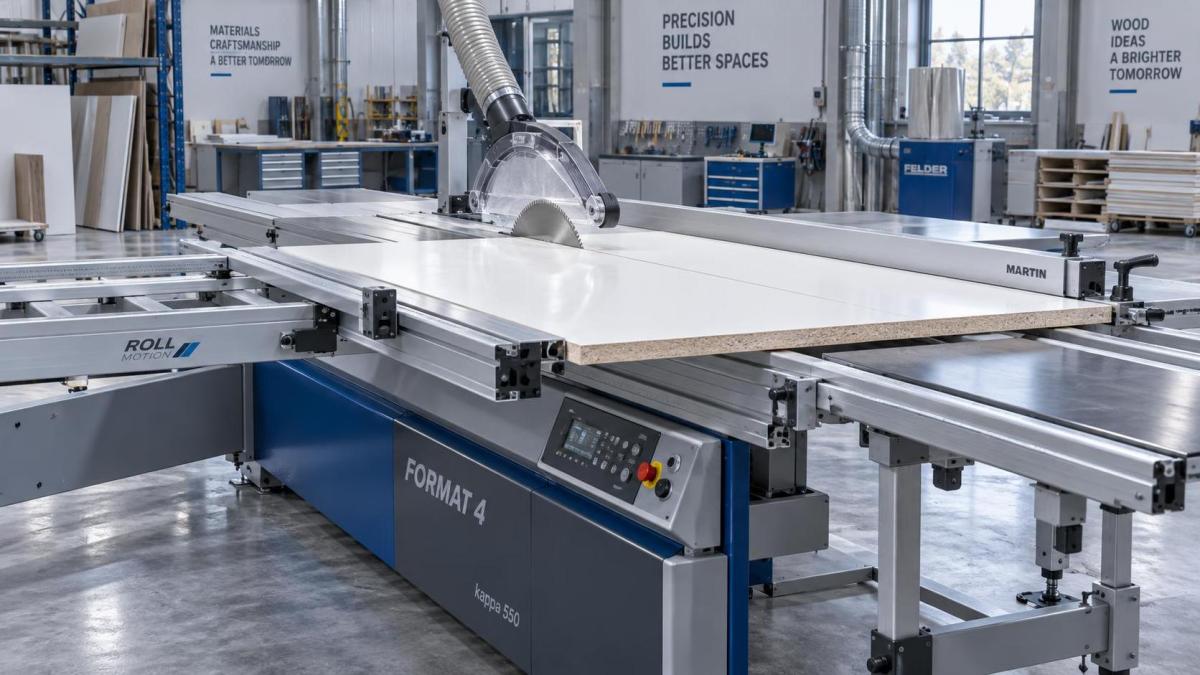
How to keep a sliding panel saw accurate when cutting large panels
Large panels expose small errors. A fence that is only slightly out of parallel, a sliding table with a trace of side movement, or a panel that is not fully supported can produce a cut that looks acceptable at the front edge and drifts at the far end. The result is poor squareness, visible gaps during cabinet assembly, chipped melamine, or repeated trimming that wastes sheet material.
Accuracy begins before the panel reaches the blade. The saw must be stable, clean, aligned, and used with a repeatable reference method. When a dimensional problem appears, avoid adjusting every setting at once. First identify whether the error follows the sliding table, the crosscut fence, the rip fence, the blade, or the panel itself.
Start with a stable machine and a clean reference surface
A sliding panel saw cannot hold its settings if the machine base moves under load. Confirm that the saw sits on a firm, level floor and that its support points are carrying the machine evenly. A cabinet that rocks slightly may seem harmless during short cuts, yet a heavy sheet pushed across the carriage can change the relationship between the table, blade, and fence.
Inspect the sliding table rails, carriage bearings, and mounting points before making alignment adjustments. The carriage should travel smoothly from end to end without a tight spot, knock, or detectable lateral movement. Dust packed into guide tracks can create inconsistent travel. Resin deposits on the table or support arms can also stop a coated board from sliding uniformly, causing the panel to twist against the fence during the cut.
Clean the sliding table, main table, fence faces, and extension supports with a suitable non-abrasive cleaner. Remove adhesive residue carefully; scraping aggressively can create a raised mark that later affects panel support. Keep lubricants away from surfaces that contact boards unless the machine manufacturer specifically calls for them. An oily table can reduce control and leave marks on decorative surfaces.
Separate blade problems from alignment problems
A damaged or unsuitable blade often gets blamed on the fence, while an alignment issue is sometimes mistaken for a dull blade. Look at the evidence left on the workpiece. If the cut edge burns, shows repeated scoring, or requires excessive feed force, inspect the blade first. If the dimension changes progressively from one end of a long cut to the other, investigate table travel or fence parallelism.
Use a blade suited to the panel material. Fine tooth geometry intended for laminated board, veneered sheet, or plywood generally produces a cleaner finish than a coarse ripping blade. Blade condition matters as much as tooth count. Resin buildup increases friction, and a blade with damaged teeth can pull fibers or chip the laminate in a pattern that resembles poor scoring adjustment.
Before checking alignment, make sure the blade is fully seated on a clean arbor flange and tightened correctly. Dirt trapped behind the blade can create runout. A warped blade or a bent arbor cannot be corrected by moving the fence. With the machine isolated from power, rotate the blade by hand and observe whether its body visibly wobbles. A dial indicator gives a more reliable assessment where available, but even without one, obvious side movement means the blade should be addressed before proceeding.
Verify that the sliding table tracks the blade
For large crosscuts, the sliding table is the primary reference. Its travel should remain parallel to the blade over the usable cutting length. A practical test uses a straight, stable test board with one prepared edge. Place that edge against the crosscut fence, make a full-length cut, then inspect both the cut and the offcut.
A more revealing method is to mark the front and rear of the test piece, measure its width at both ends, rotate it, and make a second cut from the same referenced edge. Compare the two ends after the second cut. A consistent taper points toward a relationship problem between the sliding table path and blade. A single irregular mark or a rough edge points more strongly toward blade condition, feed control, or material movement.
Do not judge parallelism from one narrow offcut alone. Narrow strips can flex, shift after release, or be influenced by internal stress in plywood and particleboard. Use a panel long enough to show the error across the distance that matters in production.
Adjustment locations differ by machine design. Some saws provide carriage or rail adjustment at the table mounting points, while others rely on fixed rail geometry and allow only fence calibration. Consult the machine documentation before loosening structural fasteners. Small adjustments should be made incrementally, followed by another full-length test cut. Moving a rail too far in one attempt makes it difficult to understand which change corrected or introduced the error.
Set the crosscut fence by testing a square, not by trusting the scale
The degree scale on a crosscut fence is useful for returning to a setting, but it is not the final authority for a 90-degree cut. Set the fence close to square with a reliable machinist's square or a large framing square known to be accurate. Then confirm it with a cut test. The fence face must also be straight, securely clamped, and free from trapped chips at its contact points.
For cabinet parts, an effective test is to cut a rectangular panel, mark its four sides in sequence, then measure the two diagonals. Equal diagonals indicate a square rectangle when opposite dimensions match. If the diagonal difference repeats across several panels, the fence angle needs correction. If only one panel is out, inspect its reference edge, panel flatness, and whether it stayed against the fence throughout the stroke.
Fence extension length affects the result. Extending a telescopic crosscut fence gives better support for wide pieces, but a loose extension joint can introduce angular movement at the far end. Lock the extension fully, verify that its support leg contacts the floor without lifting the fence, and recheck squareness after changing its length. A support leg adjusted too long can force the fence upward or sideways; one adjusted too short leaves the extension unsupported under panel weight.
Keep the rip fence parallel without trapping the offcut
Long rip cuts on large sheets require a different check. The rip fence should be set according to the machine's intended geometry, commonly parallel to the blade or with a very slight relief at the outfeed end where the design specifies it. The aim is to prevent the freshly cut strip from rubbing the rear teeth while retaining a consistent finished dimension.
Measuring from the fence to the same blade tooth at the front and rear avoids errors caused by blade set or runout. Bring one marked tooth to the front measurement position, record the distance, rotate that same tooth to the rear position, and compare. Do this with the blade stationary and the saw disconnected from power.
If a panel begins smoothly but becomes difficult to advance near the rear of the blade, do not immediately move the fence. First inspect whether the board is closing from internal stress. Plywood, solid-core panels, and some composite sheets can release stress after the cut begins. A closing kerf often leaves rubbing marks behind the blade and may occur even with a correctly aligned fence. In that situation, support, feed technique, material selection, or a suitable splitter arrangement may need attention rather than fence adjustment.
Support the panel through the whole cut
Oversized boards must remain in the same plane from loading to exit. If one corner hangs beyond the sliding table or outfeed support, the panel can bend under its own weight. That bending changes its contact with the fence and can create a tapered cut even when the saw is aligned.
Set extension tables, outrigger supports, and outfeed devices to the machine table height. Verify this with a straightedge across the surfaces rather than by eye. A support that is slightly high can lift a panel away from the sliding table. A support that is low allows the sheet to sag, then rise or twist as the cut nears completion.
- Place the panel's stable, straight factory edge or previously machined edge against the fence. Do not use a chipped or bowed edge as the primary reference.
- Position the panel so its weight is supported before the blade enters the material, especially when crosscutting a full sheet near one end.
- Hold the work firmly against the fence without forcing it sideways into the blade path. Side pressure can mask a setup error on one cut and worsen it on the next.
- Maintain a steady carriage stroke. Stopping halfway through a coated panel can leave a visible mark, while sudden acceleration can shift a poorly supported sheet.
For repeated parts, establish a consistent loading orientation. If the same reference edge is always placed against the fence and the same face is always presented upward, dimensional differences are easier to trace. Reversing panels arbitrarily can hide a bowed reference edge until assembled parts no longer align.
Control chip-out without changing the finished dimension
Clean edges on melamine-faced board, veneer, and laminated plywood depend on blade condition, feed direction, scoring setup where fitted, and panel support. The scoring blade should follow the main blade's path closely enough to pre-cut the lower surface without widening the visible kerf. A scoring kerf that is too narrow leaves chips; one that is too wide can show as a line beyond the main cut.
Set scoring height conservatively and test it on offcuts from the same material. Different laminate faces react differently, and panel thickness alone does not determine the correct setting. A shallow score may work well on a thin decorative layer, while a tougher surface may need a slightly deeper score. Recheck after replacing either blade because tooth width and lateral position change the relationship.
Do not compensate for chip-out by slowing the feed until the blade burns. A clean cut should come from the correct blade, sound alignment, stable material support, and controlled motion. Heat marks and fused residue are signs that friction is increasing rather than a sign of improved finish quality.
Use measurements that reveal the source of drift
Accuracy checks are more useful when they are recorded. Keep a simple log of test-panel dimensions, blade changes, fence adjustments, and observed symptoms. The goal is not paperwork for its own sake; it is to distinguish a setting that slowly moves from a problem that appears only with a certain material or panel size.
Protect calibration during routine work
Accuracy is often lost through small events rather than a single major failure. A fence bumped by a loaded sheet, an extension arm used as a resting surface, accumulated dust under a stop, or a blade change performed on dirty flanges can all alter the next result. After moving the saw, changing a blade, servicing the carriage, or cutting an unusually heavy panel, verify the settings with a short test rather than assuming the previous calibration remains unchanged.
Mechanical adjustments should be locked before production cutting. Loose locking levers, worn clamping pads, or damaged scale stops create intermittent error, which is harder to diagnose than a fixed misalignment. If a setting moves only under load, inspect the locking mechanism and support structure instead of repeatedly recalibrating the fence.
When the table, blade, fences, and panel supports agree with each other, large-panel cutting becomes predictable. The finished edge should require no corrective trim, matching parts should assemble without forcing, and a repeat test should produce the same result rather than a new explanation for every sheet.
Send Your Inquiry
We welcome your cooperation and we will develop with you.