


News & Exhibitions
Latest Factory Updates, Industry Trends & Global Exhibition Information
Why Woodworking Machines Leave Burn Marks on Solid Wood—and How to Fix Them
Burn marks on solid wood usually develop when a cutting edge or abrasive rubs the surface long enough to concentrate heat. Start by identifying where the discoloration appears, then inspect the tooling, feed conditions, and machine geometry in that order. Increasing feed speed sometimes removes the symptom, but a dull edge, trapped offcut, or misaligned fence requires a different correction.
Before changing settings, retain a marked sample and record the wood species, tool identification, spindle speed, feed setting, and cutting depth. For woodworking equipment, including machines menuiserie, these details make it possible to distinguish a repeatable machine fault from a problem tied to one board or machining operation.
Let the burn pattern narrow the search
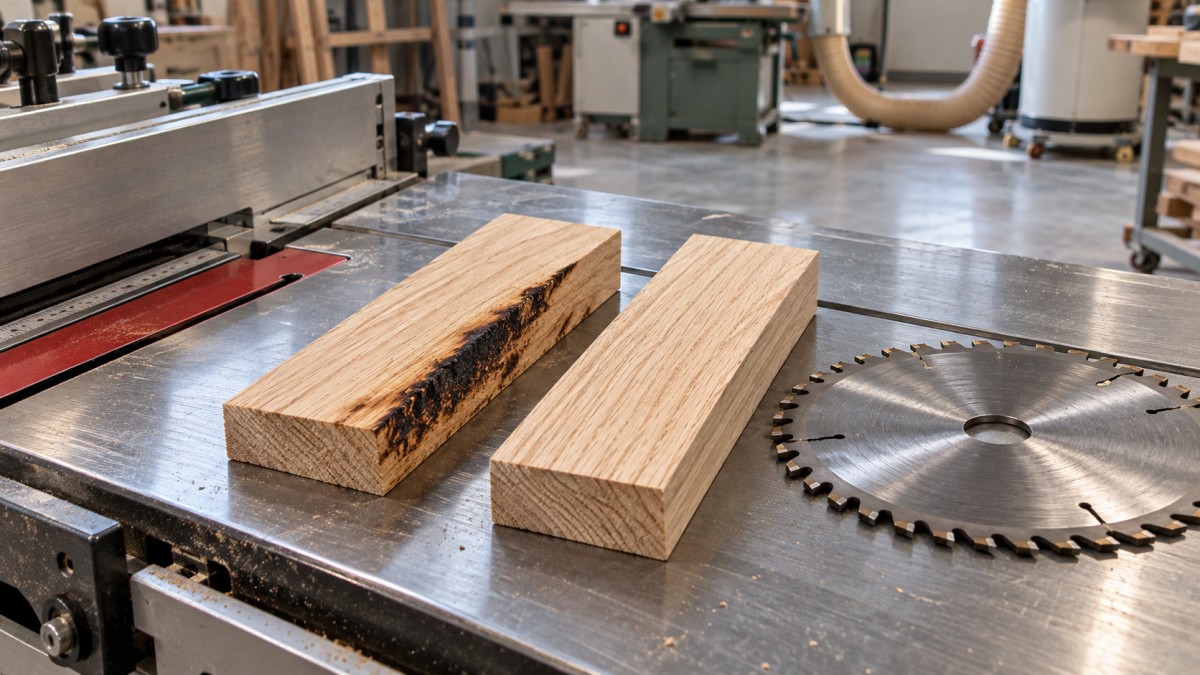
A dark surface alone does not establish the cause. Compare the location of the mark with the direction of travel and the point where the workpiece first contacted the tool. A continuous brown line suggests sustained rubbing; a concentrated patch often points to a pause, restricted movement, or local grain conditions.
Separate scorching from other discoloration before adjusting the machine. Mineral streaks follow the wood structure and remain visible beyond the machined face. Metal contamination can produce dark staining in tannin-rich timber, especially with moisture present. Actual burning follows the contact path and often accompanies a polished surface or scorched odor. Odor alone is not a reliable diagnosis.
Restore the cutting edge before compensating with settings
Isolate electrical power and any stored energy before touching blades, cutters, feed components, or extraction openings. Resin buildup is a common source of unnecessary troubleshooting because a coated tool can appear serviceable while its cutting clearance is reduced. Deposits on the tooth sides or cutter body increase friction and encourage further buildup.
Clean the tool using a product compatible with its carbide, brazing, coatings, and body material. Follow the cleaner’s dilution and exposure instructions, then dry the tool before installation. Aggressive scraping can damage an edge; prolonged soaking in an unsuitable chemical can attack tool materials. Remove deposits from mounting faces as well, since trapped debris can prevent proper seating.
Cleaning does not restore a rounded edge. Under suitable magnification, inspect for edge rounding, chipped carbide, damaged tips, and uneven wear. A cutter that leaves one scorched stripe at a consistent profile location deserves inspection at that exact part of its edge. Replace damaged tooling or send serviceable tools for professional sharpening within their specified limits.
Confirm that the tool suits the operation. A blade selected for fine crosscutting can struggle during a deep rip cut because chip space and cutting geometry differ. A router bit with a long cutting length also has different stiffness and engagement characteristics from a shorter tool. Tool diameter, tooth or flute count, projection, and cutting depth must be considered together.
Balance feed, speed, and material removal
Slow feed is a frequent cause of burning, particularly when the cutting edge repeatedly passes over nearly the same surface. However, increasing feed without considering spindle speed, tool condition, and cutting load can introduce deflection, tear-out, or an overloaded drive.
For a cutter with a defined tooth or flute count, nominal feed per tooth equals linear feed speed divided by spindle revolutions per minute and the number of cutting edges. Units must be consistent. This relationship explains why fitting a cutter with more teeth while retaining the same feed and speed reduces the nominal chip taken by each edge.
Use the tooling supplier’s operating range as the starting point. Actual chip formation also changes with radial engagement, grain direction, and cutter geometry. A calculated feed per tooth does not prove that a shallow finishing pass is cutting effectively; very light engagement can leave the edge rubbing instead of forming a useful chip.
During a controlled trial, change one setting and observe both the surface and machine response. If the cut is clean at steady travel but burns during hesitation, address feed continuity. If increasing feed produces chatter or heavy loading, investigate excessive cutting depth, insufficient support, or unsuitable tooling before increasing it further.
Reducing spindle speed can reduce repeated contact, but it also changes cutting forces and the available operating conditions. Stay within the machine and tool limits. Where engagement is excessive, divide the cut into suitable passes while preserving enough material for the finishing pass to cut cleanly.
Routing corners and deep profiles
A routed corner can burn even when the straight sections are clean. CNC motion slows as the machine negotiates tight geometry, while the spindle continues turning. Engagement also increases in some internal corners. Examine actual feed behavior through the affected section rather than relying only on the programmed feed value.
A separate finishing operation, revised entry path, or suitable smaller cutter can improve difficult geometry. Any toolpath change must preserve secure workholding and an appropriate cutting direction. On manually fed equipment, do not switch to climb cutting as an improvised cure; the tool can pull the workpiece forward unexpectedly.
When a sharp saw blade still leaves a burned edge
Persistent burning on one side of a saw cut warrants a geometry inspection. With the machine isolated, verify blade seating, arbor flange cleanliness, blade condition, and alignment using the machine manufacturer’s reference surfaces and procedure. Inspect the arbor and bearings if measured runout or play exceeds the specified tolerance.
A fence that directs stock toward the rear of the blade can create additional contact after the teeth have made the cut. Blade deflection produces a similar symptom, especially with excessive projection, unsuitable blade stiffness, or poor support. Avoid applying a universal fence offset: the correct setup depends on the saw design and its instructions.
Watch for internal stress in solid wood. A board that closes the kerf can pinch the blade despite correct machine alignment. Compare the affected stock with a stable reference board, and inspect the riving knife or splitter for correct specification and alignment. Never remove this component to make a pinching cut easier.
Long stock needs support that maintains the intended travel path. A support positioned too high can lift or steer the board; insufficient outfeed support encourages hesitation near the end of the cut. Keep hands and adjustments away from the cutting zone, and restore guards before every trial.
Planers, moulders, and sanders need different corrections
On a planer or moulder, begin by confirming that the dark area is heat damage. Tear-out casts shadows, and compressed grain can look darker under oblique light. Inspect the surface with changing light direction and compare it with a lightly pared or sanded area.
If scorching is confirmed, inspect knife projection or insert seating, cutter condition, and actual feed movement. A feed roller that slips can leave the wood dwelling beneath the cutter. Resin on rollers, incorrect pressure settings, or worn feed components can therefore produce burning even when the displayed feed speed appears suitable.
Use the specified knife-setting or insert-installation procedure. Debris beneath an insert or incorrect seating can concentrate cutting on a small part of the head. Randomly increasing roller pressure is a poor correction for slipping because it can mark the stock or alter how it passes through the machine.
Sanding burns arise from abrasive friction rather than cutting-edge geometry. Examine the abrasive for loading, glazing, uneven wear, and a damaged splice. A belt that has lost its cutting ability often generates heat while removing little material. Reducing feed speed under these conditions extends contact and can deepen the damage.
Match stock removal to the abrasive grit and machine capacity. Large thickness corrections belong earlier in the process; forcing a fine belt to remove excessive material encourages heat and loading. Inspect dust extraction and the pressure system before changing settings. A worn platen pad or localized pressure point can create a stripe that survives repeated belt changes.
Smoke, glowing material, or an abnormal temperature rise requires stopping the process and following the machine and extraction system’s fire-response procedure. Do not continue test cuts while heat or ignition remains unexplained.
Use the wood itself as a diagnostic variable
Dense hardwoods, resinous stock, reversing grain, and end grain place different demands on a tool. A setting that works on one species does not establish a suitable setting for another. Resin pockets can create deposits rapidly, while grain changes can raise cutting resistance within a single board.
Measure moisture content with an appropriate method and compare affected stock with material that machines cleanly. Moisture influences stability and cutting behavior, but a reading alone cannot explain a burn. Record whether the board binds, changes shape after ripping, or develops deposits on the tool; those observations connect the material condition to the defect.
Verify the correction before removing the evidence
After restoring guards and extraction, test on comparable stock with the same grain orientation, cutting depth, and support arrangement. Include the part of the operation that originally caused trouble: the end of a rip, an internal corner, or a full-length moulding pass. A short, easy cut can miss the original trigger.
Allow enough cutting for deposits, heat, or feed instability to reappear. Compare the new surface with the retained sample, and record the tool condition and settings that produced the acceptable result. If the burn returns only after extended cutting, inspect deposit formation, extraction performance, and progressive tool wear.
Remove residual scorching only after the process is stable. Light discoloration may sand out, but deeper damage requires additional material removal and a dimensional check. On a finished profile or joint surface, assess the remaining allowance before reworking it; eliminating the color is insufficient if the correction changes the fit.
Send Your Inquiry
We welcome your cooperation and we will develop with you.